
Create your restaurant
Name your restaurant, choose its web address and open your first dashboard.
- Goal
- Your restaurant exists, your 14-day free trial has started and you are looking at your new dashboard.
- Before you start
- A confirmed account (see Create your account)
- The name you want guests to see
You create a restaurant once, right after you confirm your e-mail. The same form is used later through Create another restaurant if you run more than one place; one account can own up to 5 restaurants. Creating the restaurant starts the free trial automatically.
Open the setup form
After you confirm your e-mail you land on Set up your restaurant. There are three fields: Business name, Restaurant name and Web address.
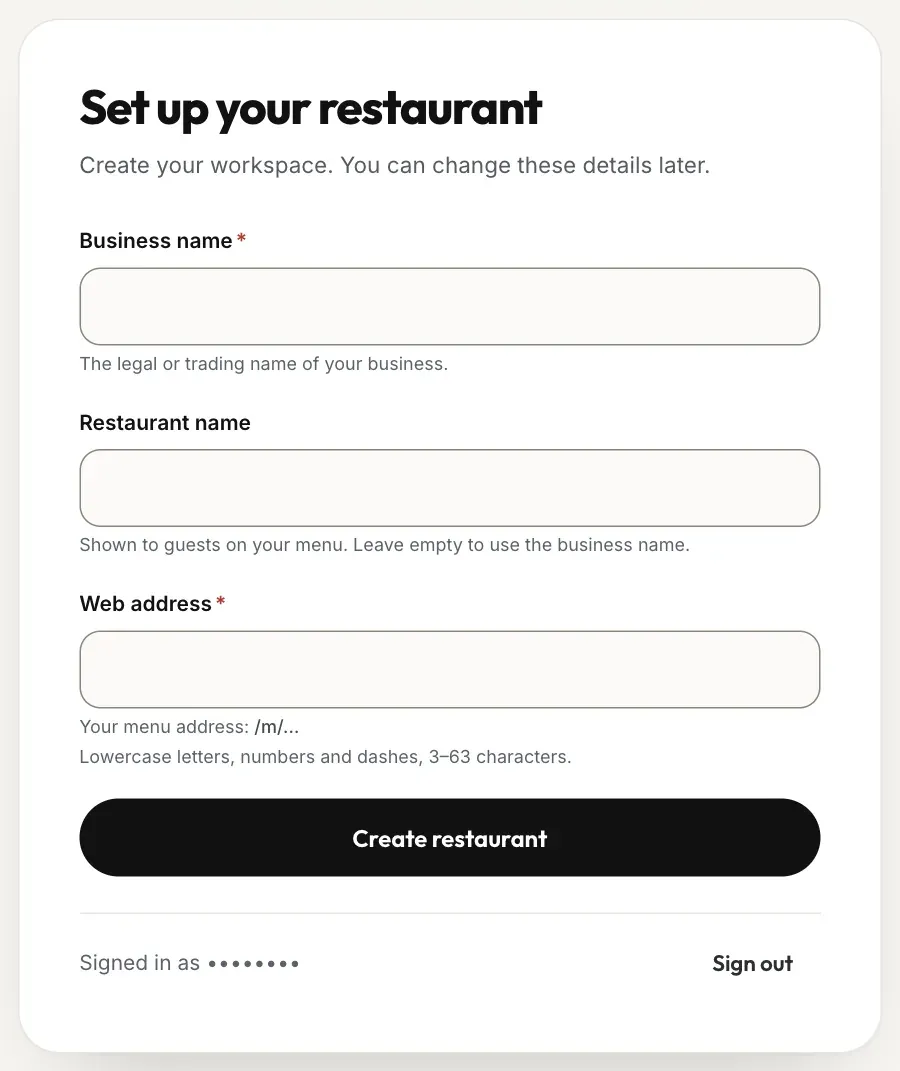
- Business name
- Restaurant name
- Web address
Type the names and the web address
Business name is the legal or trading name of your business. Restaurant name is what guests see on your menu; leave it empty to use the business name. Web address follows the business name as you type, and you can change it. Below it the form shows Your menu address, for example /m/olive-ember-kitchen. Use only lowercase letters, numbers and dashes, 3 to 63 characters. This address is part of your menu link, so choose it with care.
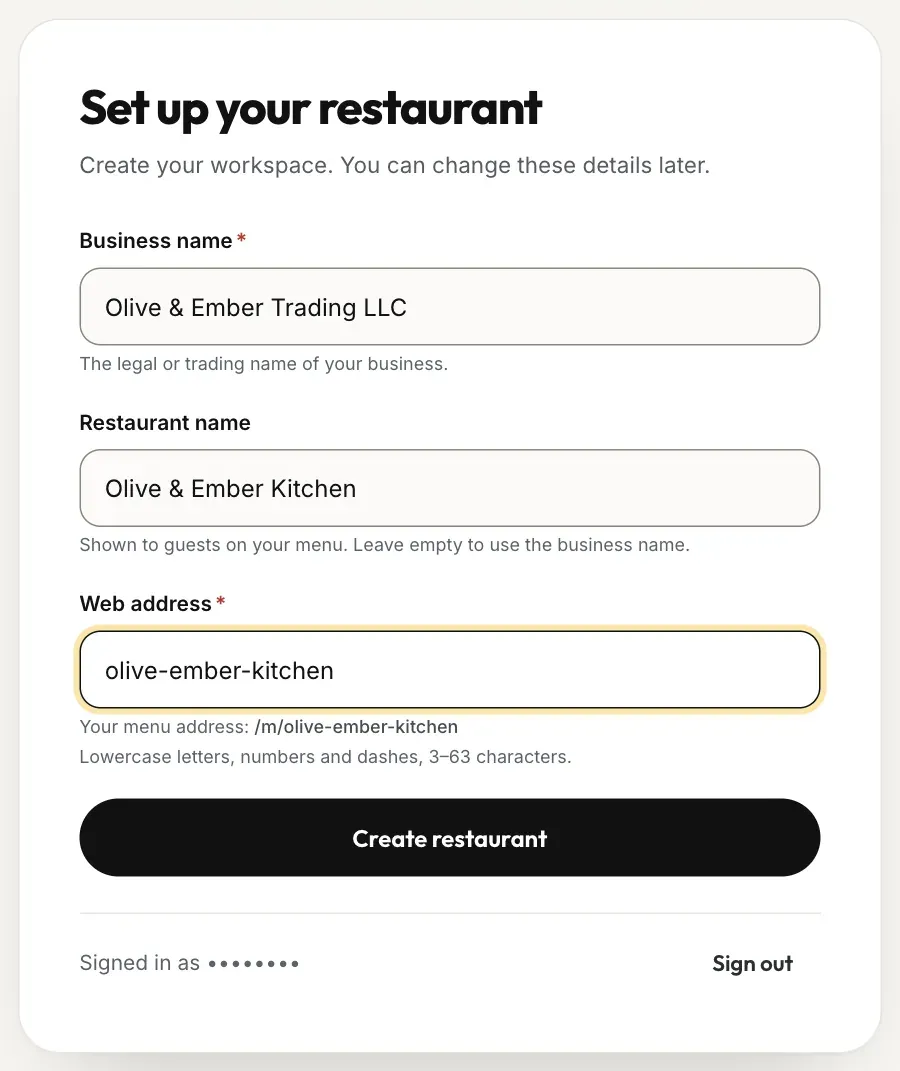
- Business name
- Restaurant name
- Web address
- The preview of your menu address
Fix an address that is refused
If someone already uses the address, the form says That web address is already taken. Try another one. A few words are kept back by RothDine (for example demo), and they give That web address is not available. Try another one. Change the address until the message disappears.
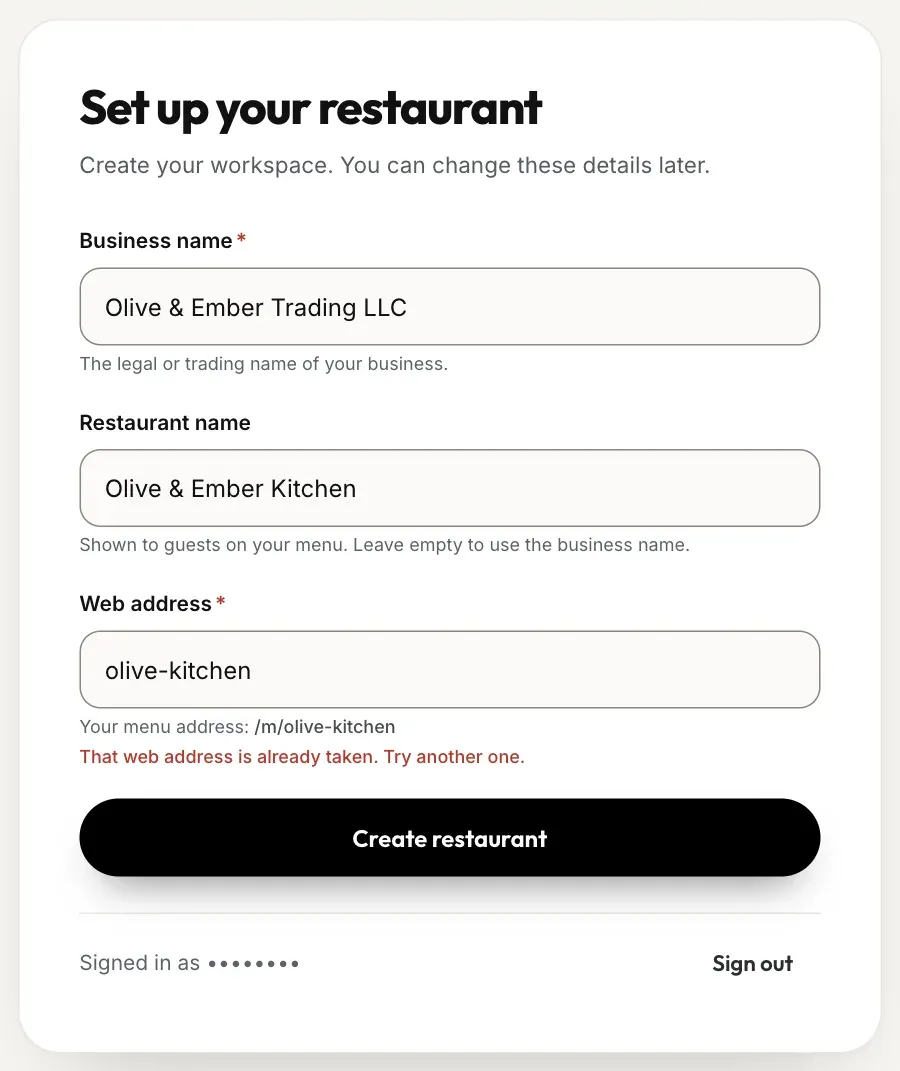
- The web address that is already taken
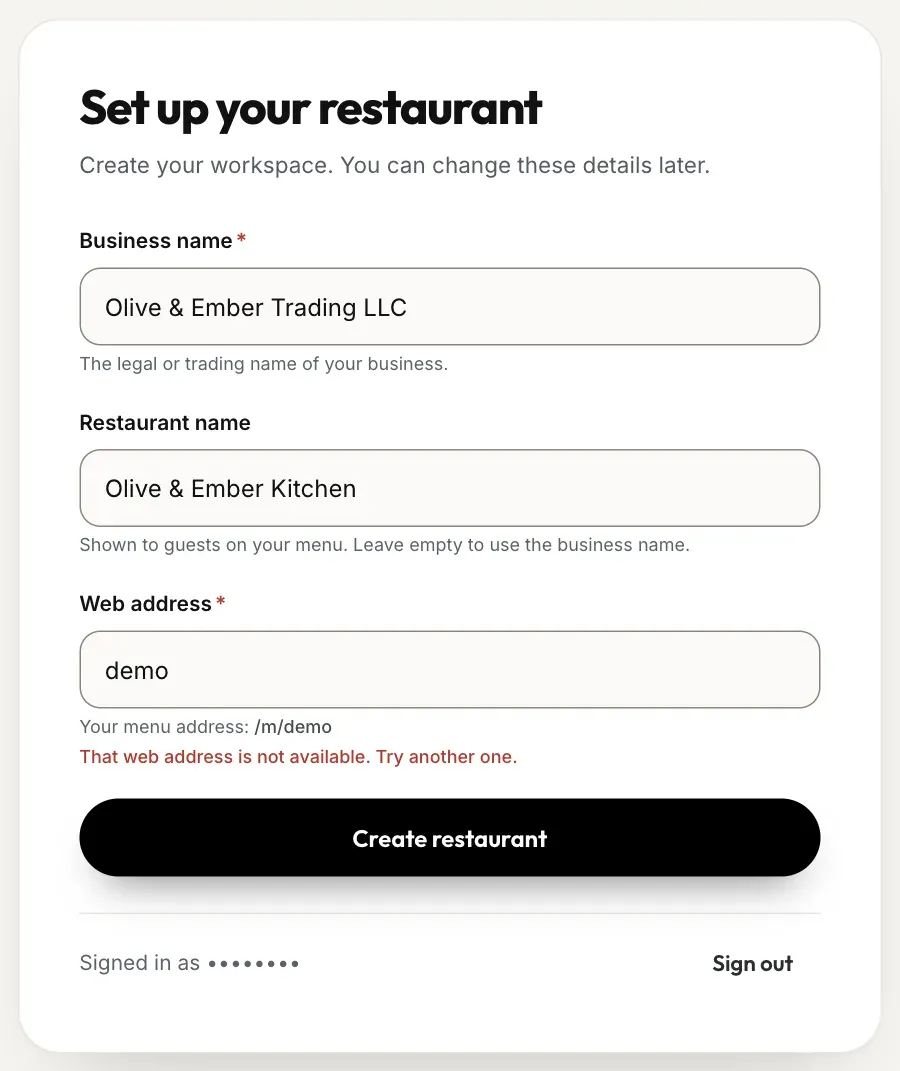
- The web address that is not available
Create the restaurant
Click Create restaurant. Pressing it twice does not create two restaurants. A message says Your restaurant is ready. and you move to the dashboard.
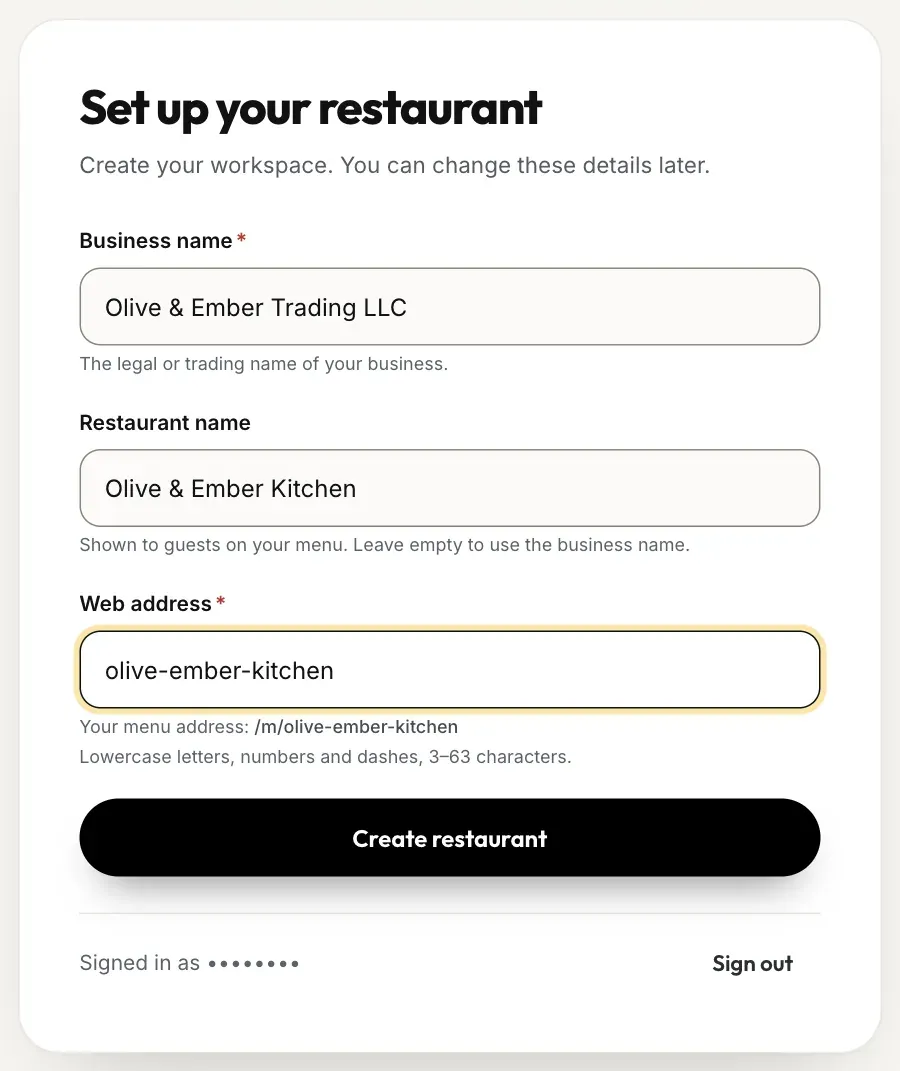
- A free web address
- The Create restaurant button
Meet your dashboard
The dashboard greets you with Welcome back and a panel called Set up your restaurant with seven steps. A new restaurant starts with no branch, no menu and no QR code, so the panel shows 0 of 7 steps done. The next guide explains each step.
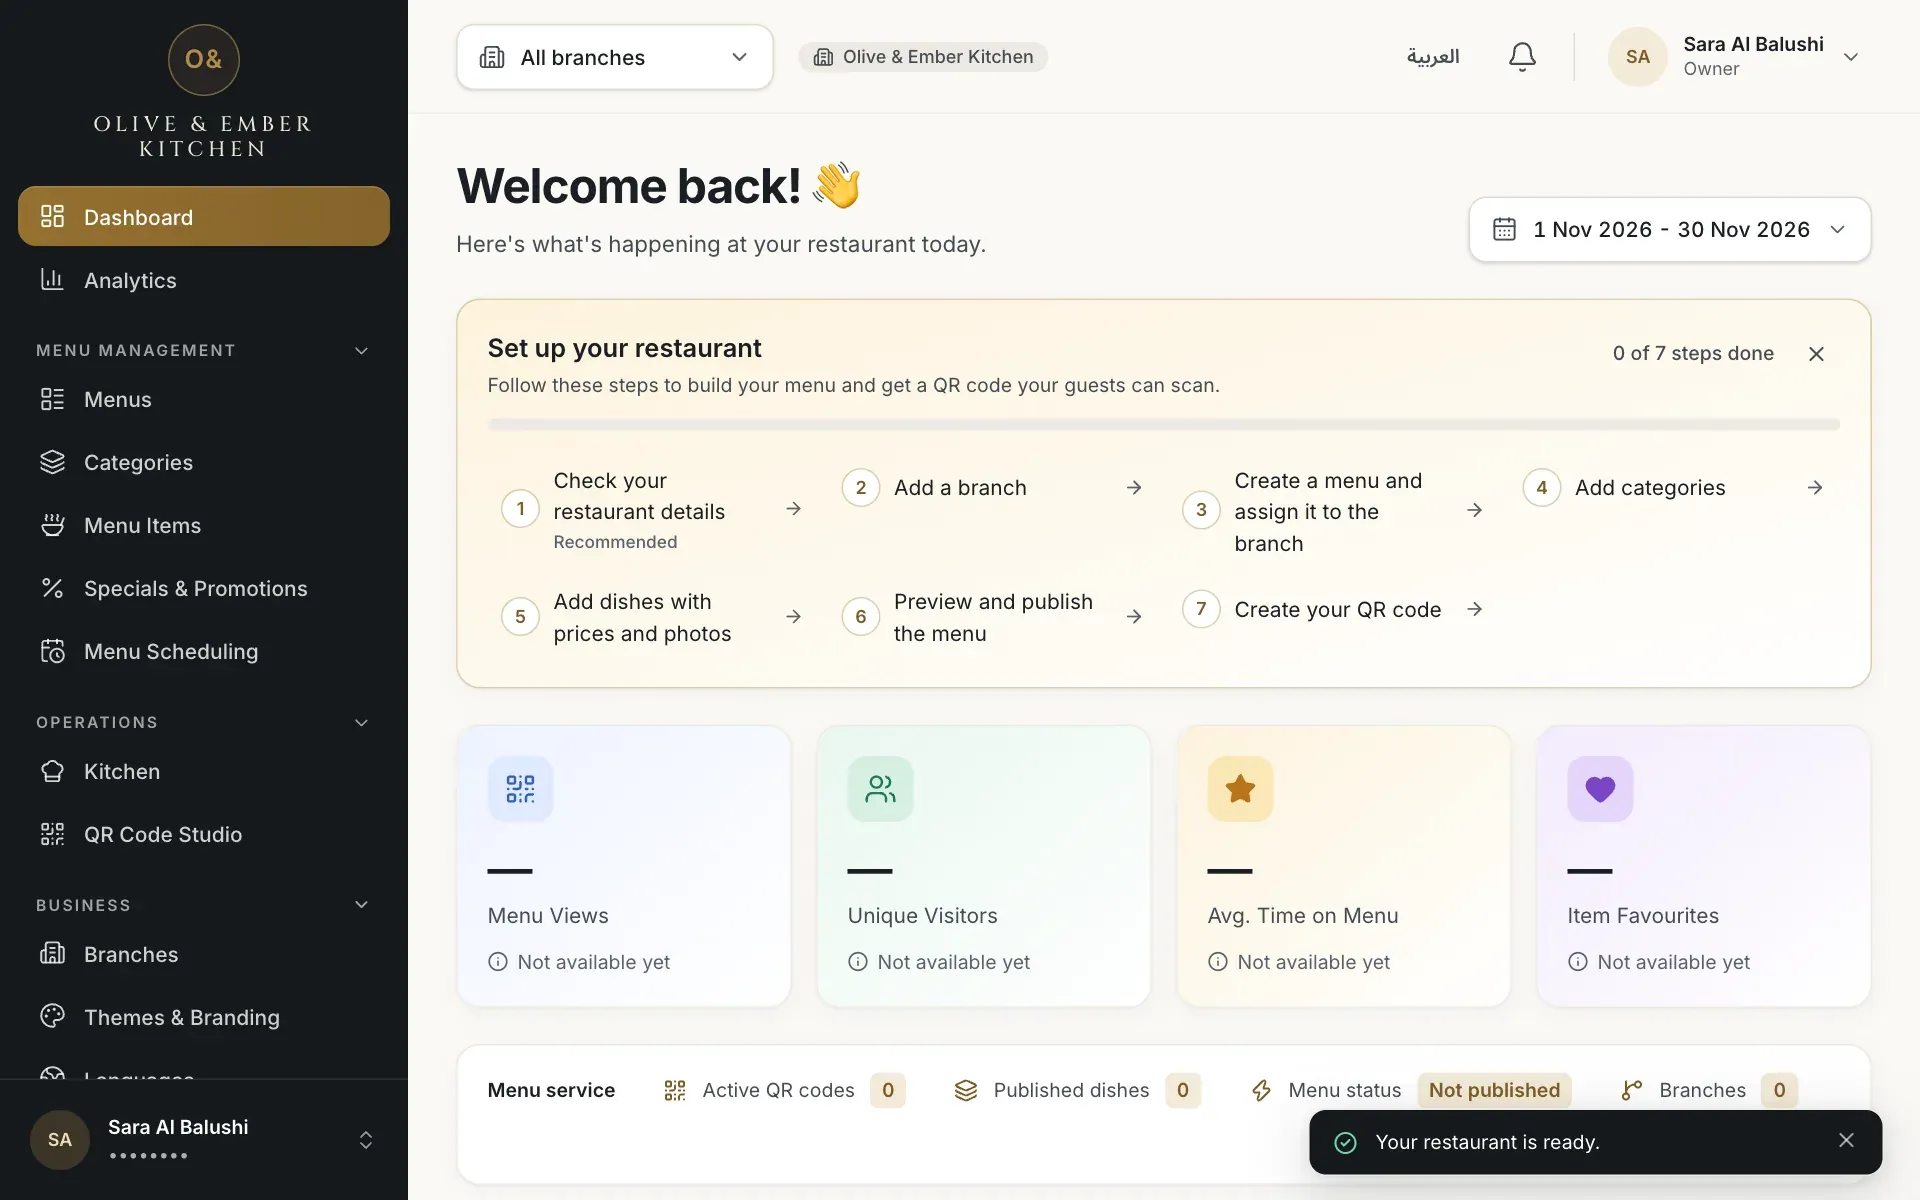
- The setup checklist
No branch yet
Creating a restaurant does not create a branch. You add the first one yourself, see Add a branch. Until then you cannot create a branch or table QR code.
Troubleshooting
Another restaurant uses it. Add a word, such as your city or branch name, and check that the preview under the field looks right.
The address is on RothDine's list of kept words. Choose a different one.
The web address accepts only English lowercase letters, numbers and dashes, 3 to 63 characters, and it cannot start or end with a dash. An Arabic name needs an English address, for example zaytoun-wa-jamr.
One account can own up to 5 restaurants. Contact support@rothdine.com if you need more.
Open the confirmation e-mail first. See Create your account.
Related guides
- Getting startedQuick-start checklistThe seven setup steps on your dashboard, what each one opens, and the shortest road from an empty restaurant to a live QR menu.
- Getting startedYour 14-day free trialWhat the free trial includes, where you see its end date and what pauses when it ends.
- Restaurant setupRestaurant profileSet your restaurant's Arabic name, taglines and contact details, and learn what guests do and do not see.
- Restaurant setupAdd a branchAdd your first branch with its names, address, phone and e-mail, and understand the branch limit.