
Add a branch
Add your first branch with its names, address, phone and e-mail, and understand the branch limit.
- Goal
- Your restaurant has a branch with its address, phone and e-mail, ready for hours, menus and QR codes.
- Before you start
- A restaurant created in RothDine
- Owner or admin access
A branch is one place where guests are served. Menus, opening hours, tables and table QR codes all belong to a branch. A new restaurant has no branch, so this is the first thing to do after the restaurant exists.
Open Branches
In the sidebar, under Business, choose Branches. The page is empty. Click Add branch.
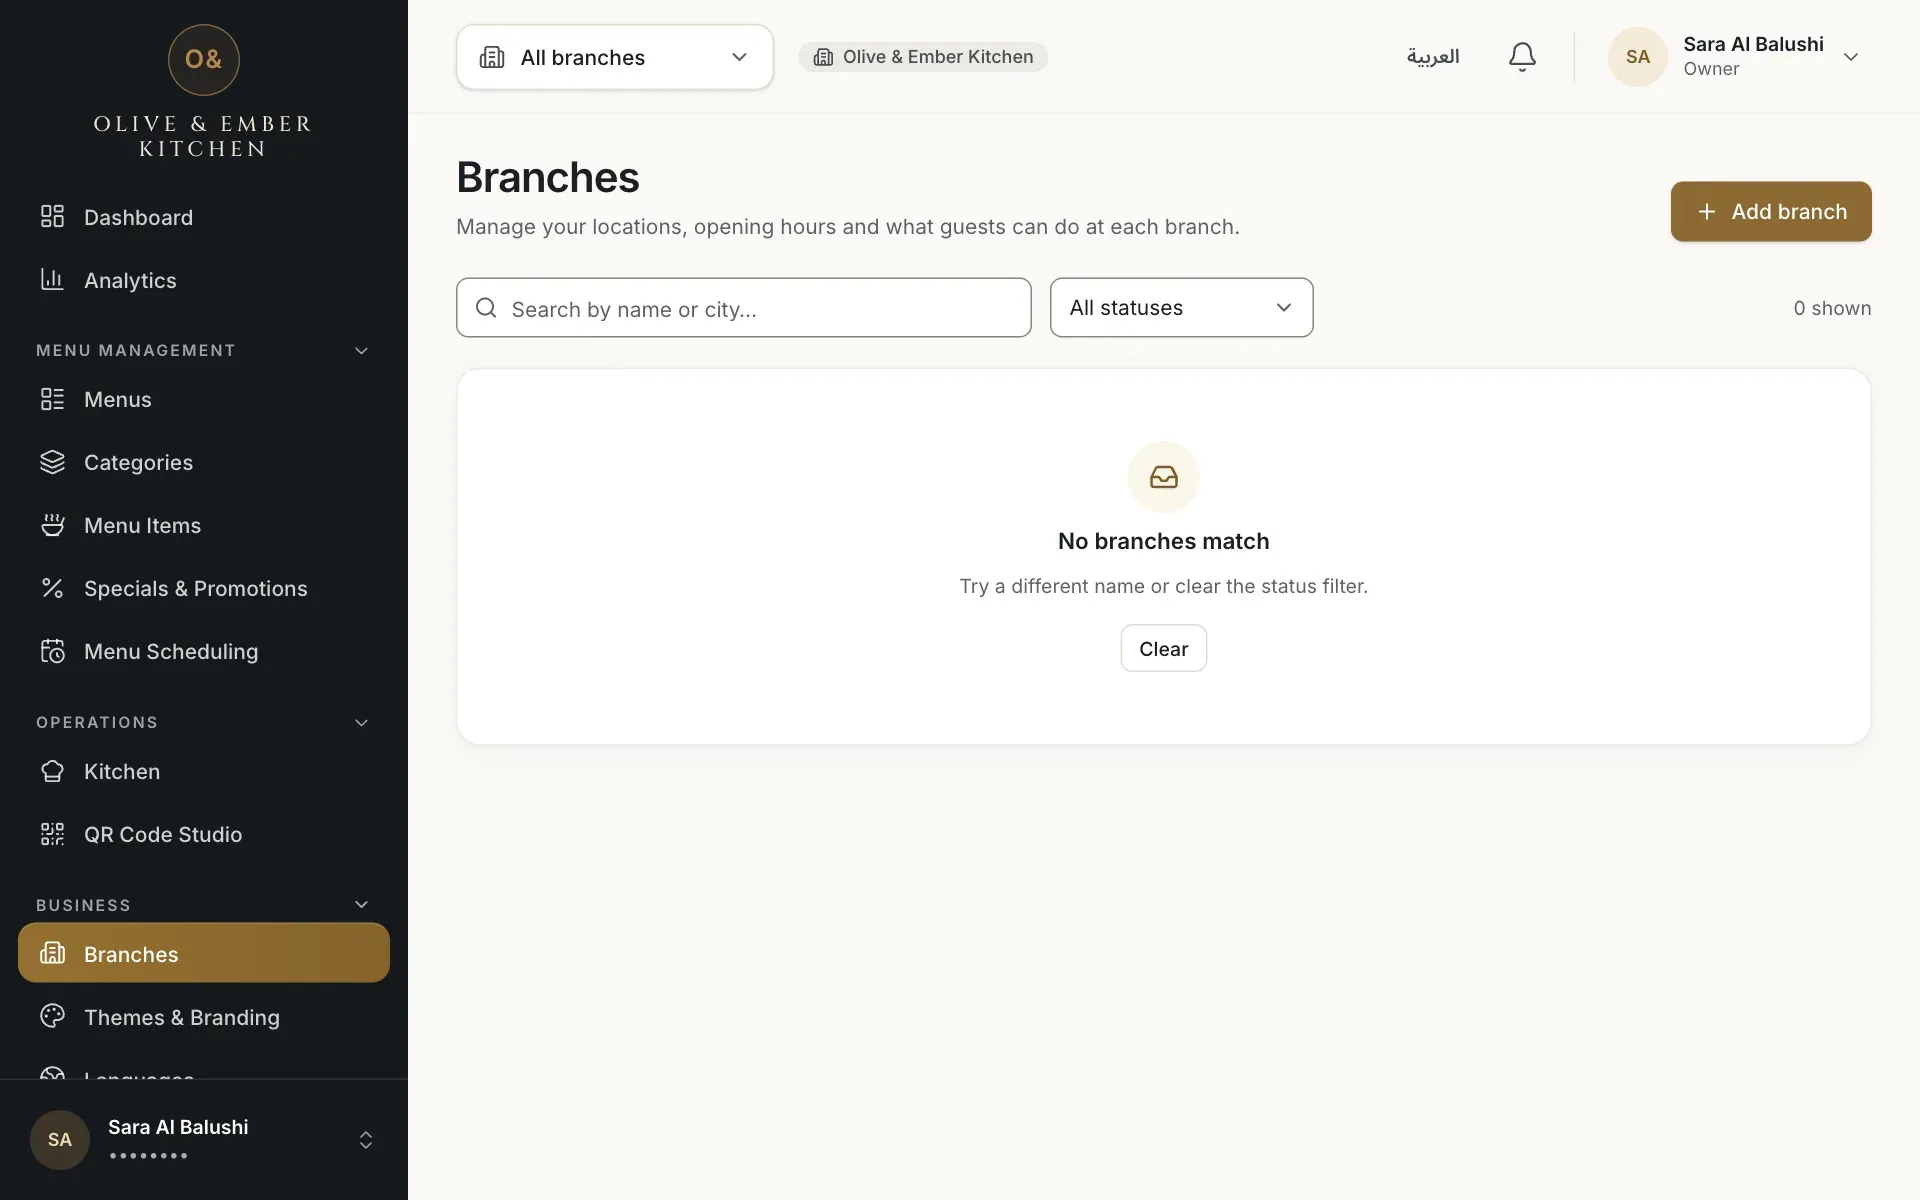
- The Add branch button
Fill in the branch details
The dialog Add a branch asks for everything twice, in English and in Arabic: Name (English) and Name (Arabic) (2 to 60 characters), City (2 to 60) and Address (5 to 160). Then add the branch Phone and Email. Guests use these for the Call and Email buttons, so use the branch's own numbers. Finally choose the Operating mode for this branch, see Operating modes. The Arabic fields accept only Arabic letters.
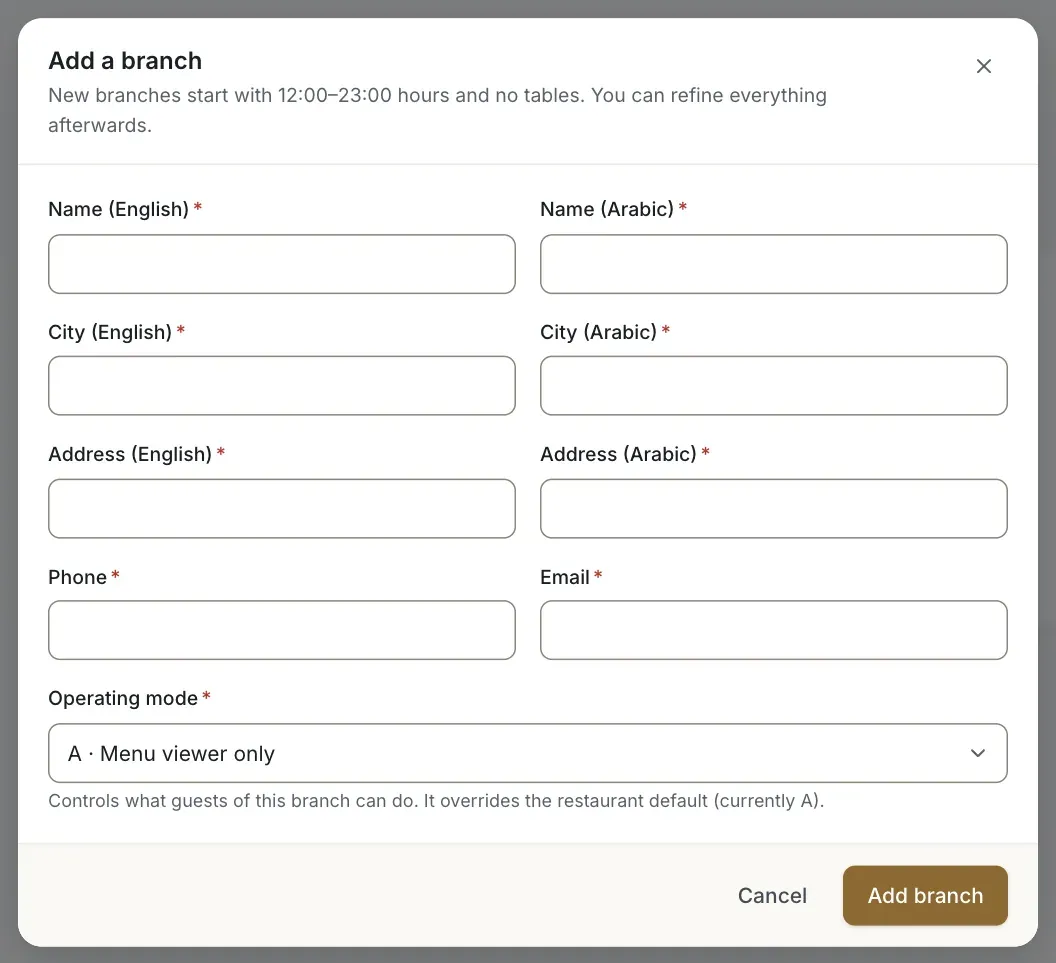
- Name (English)
- Name (Arabic)
- City (English)
- Address (English)
- Phone
- Operating mode
Use the international phone format
Type the phone with the country code and without spaces, for example +96824123456. A number such as 24123456 is refused with Use international format, for example +96824123456. Fix it, then click Add branch.
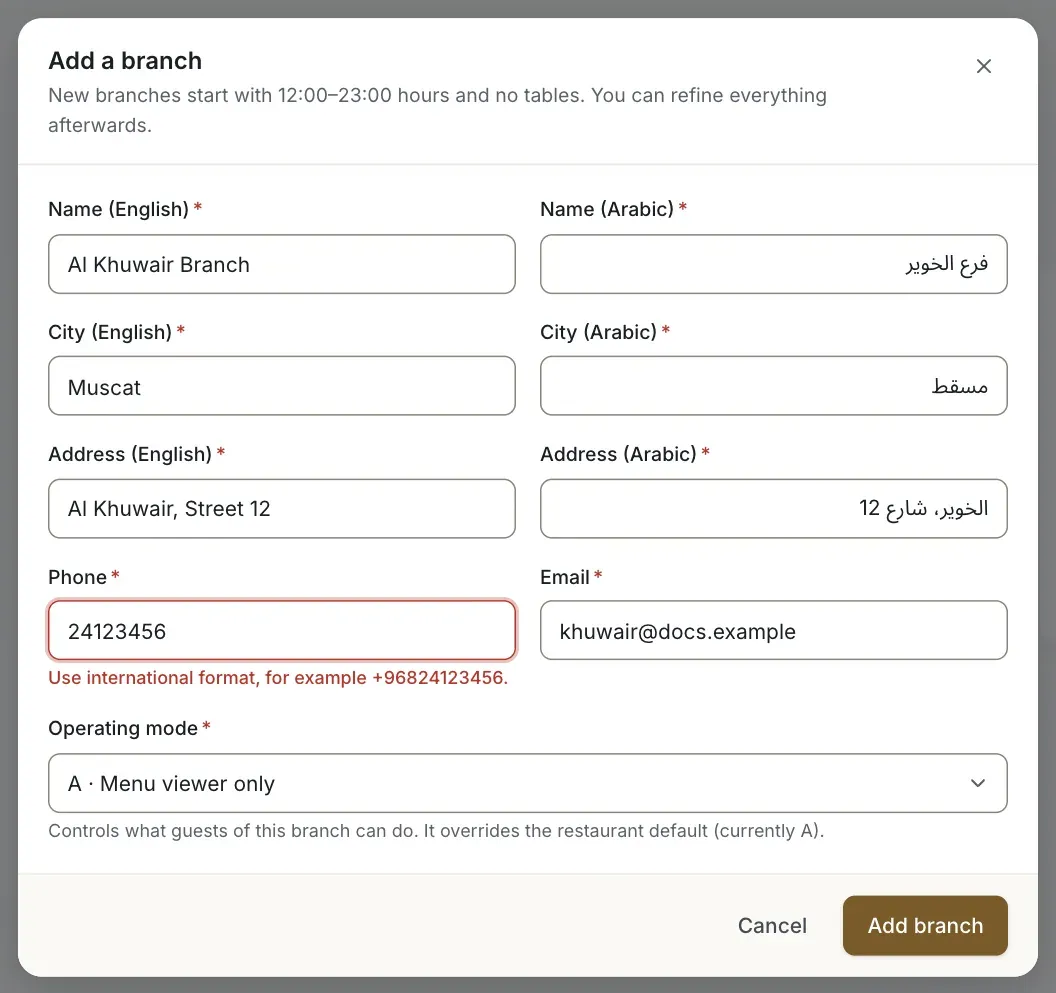
- The phone number that needs the country code
- The Add branch button
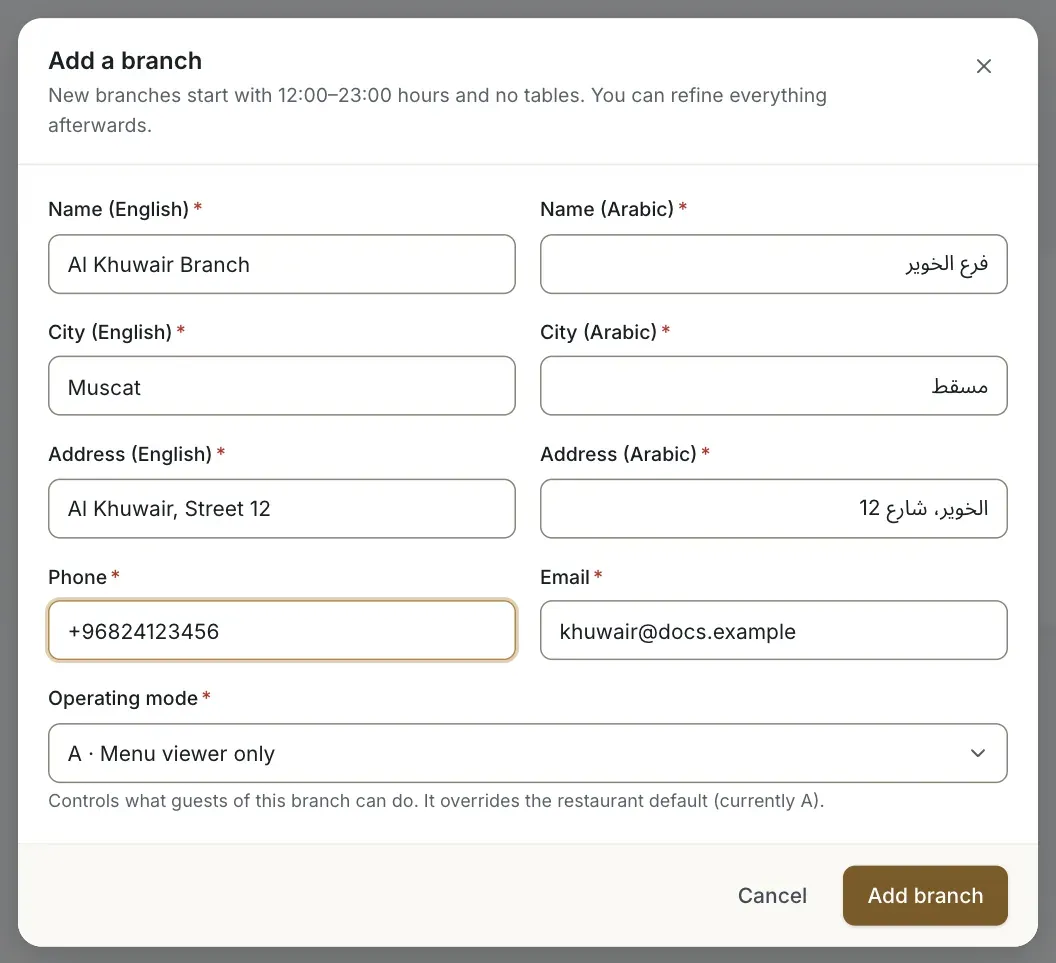
- The Add branch button
Check the new branch
The notice Branch added. appears and the branch is listed with its status Active, whether it is Open now or Closed now, its hours, phone and e-mail. A new branch starts with hours from 12:00 to 23:00 and with no tables.
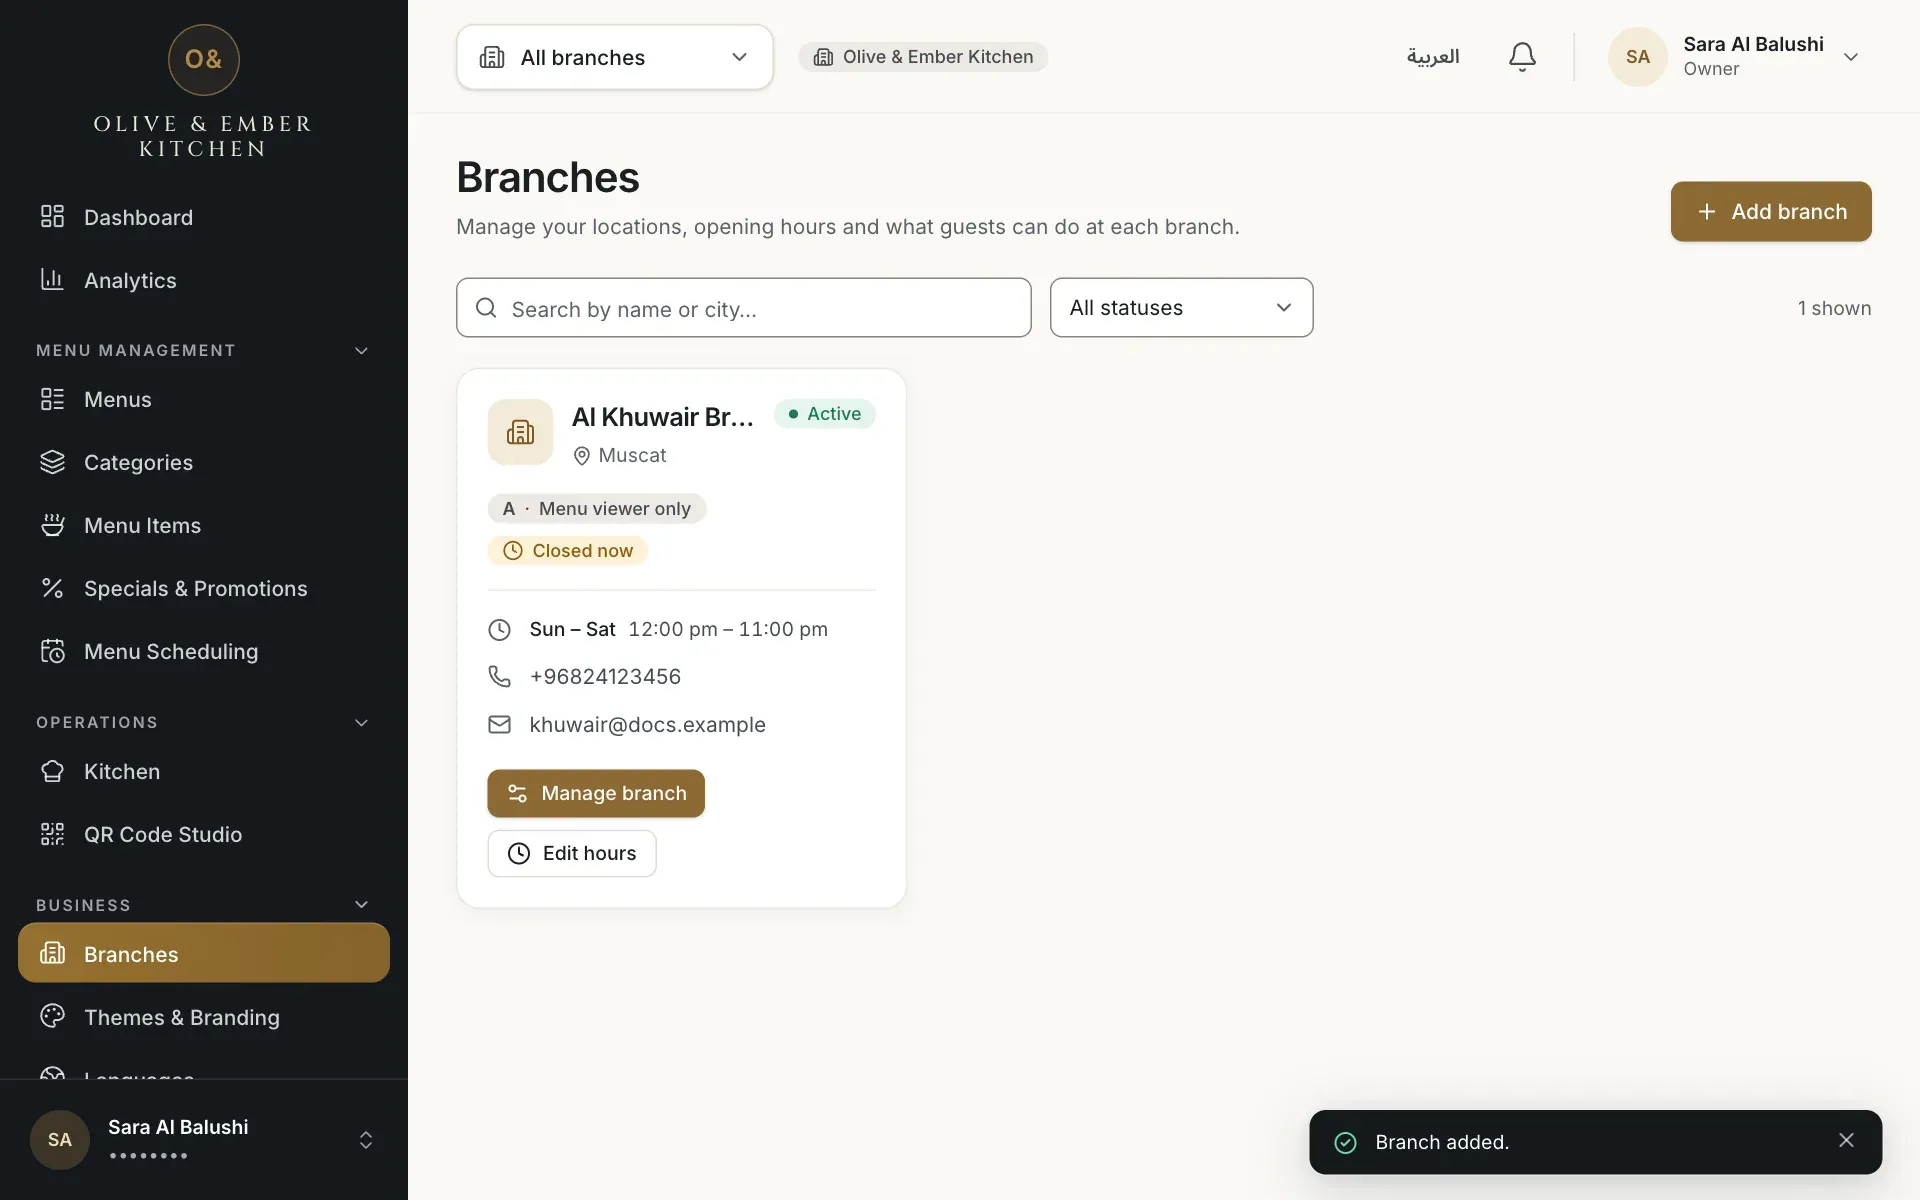
- The new branch card
Open the branch details
Click Manage branch. The tabs Details and Opening hours are fully working: change names, address, phone, e-mail and mode, or edit the weekly hours, see Opening hours. The tabs Special hours and Menus show sample data and are not saved yet, so do not rely on them. To serve a menu at the branch use the Branches action on the Menus page.
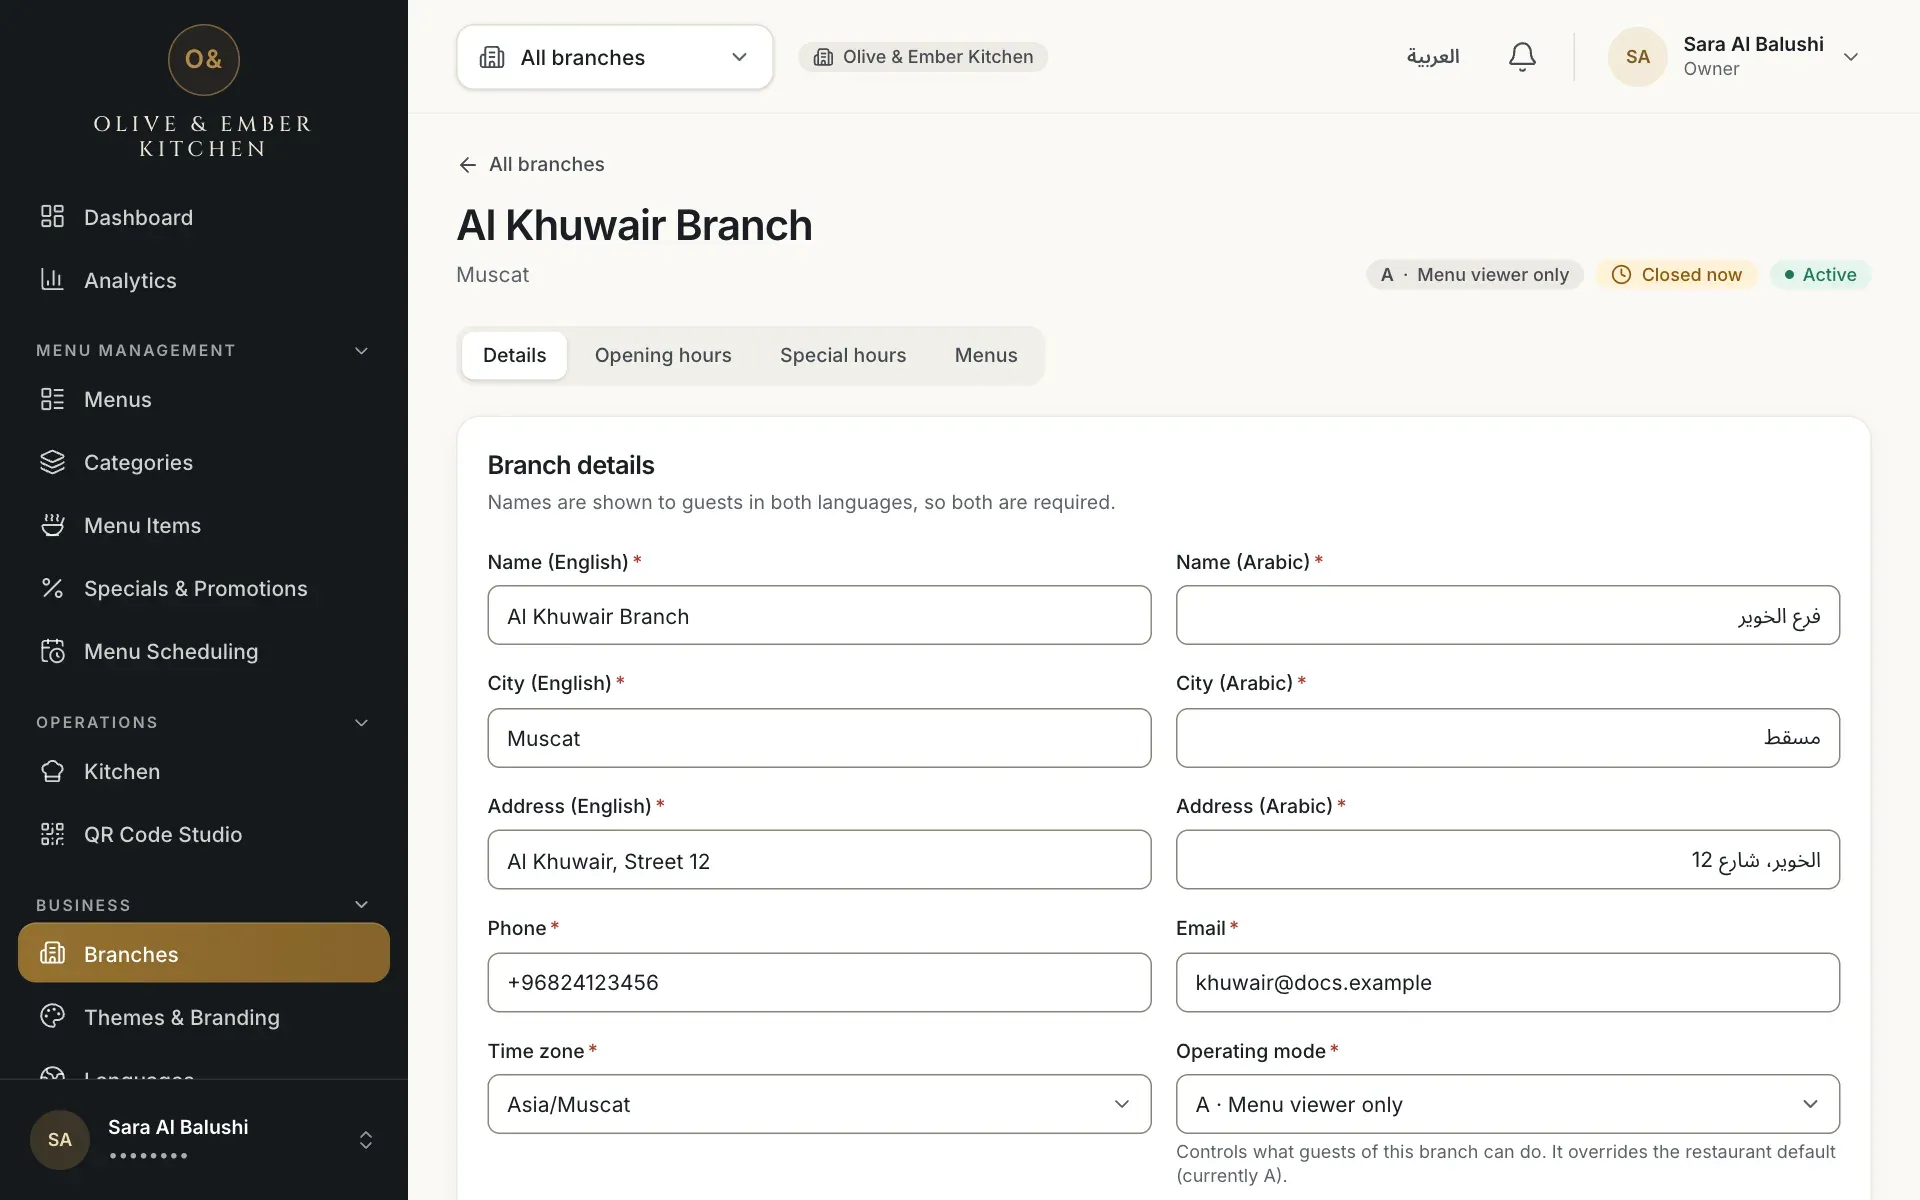
- The Details tab
- The Opening hours tab
- The branch details form
Know the branch limit
Your plan limits the number of active branches: 1 on the free trial, Starter and Professional, and 3 on Business. Trying to add one more shows A limit has been reached for this account., in English even in the Arabic screens. See Plans and limits.
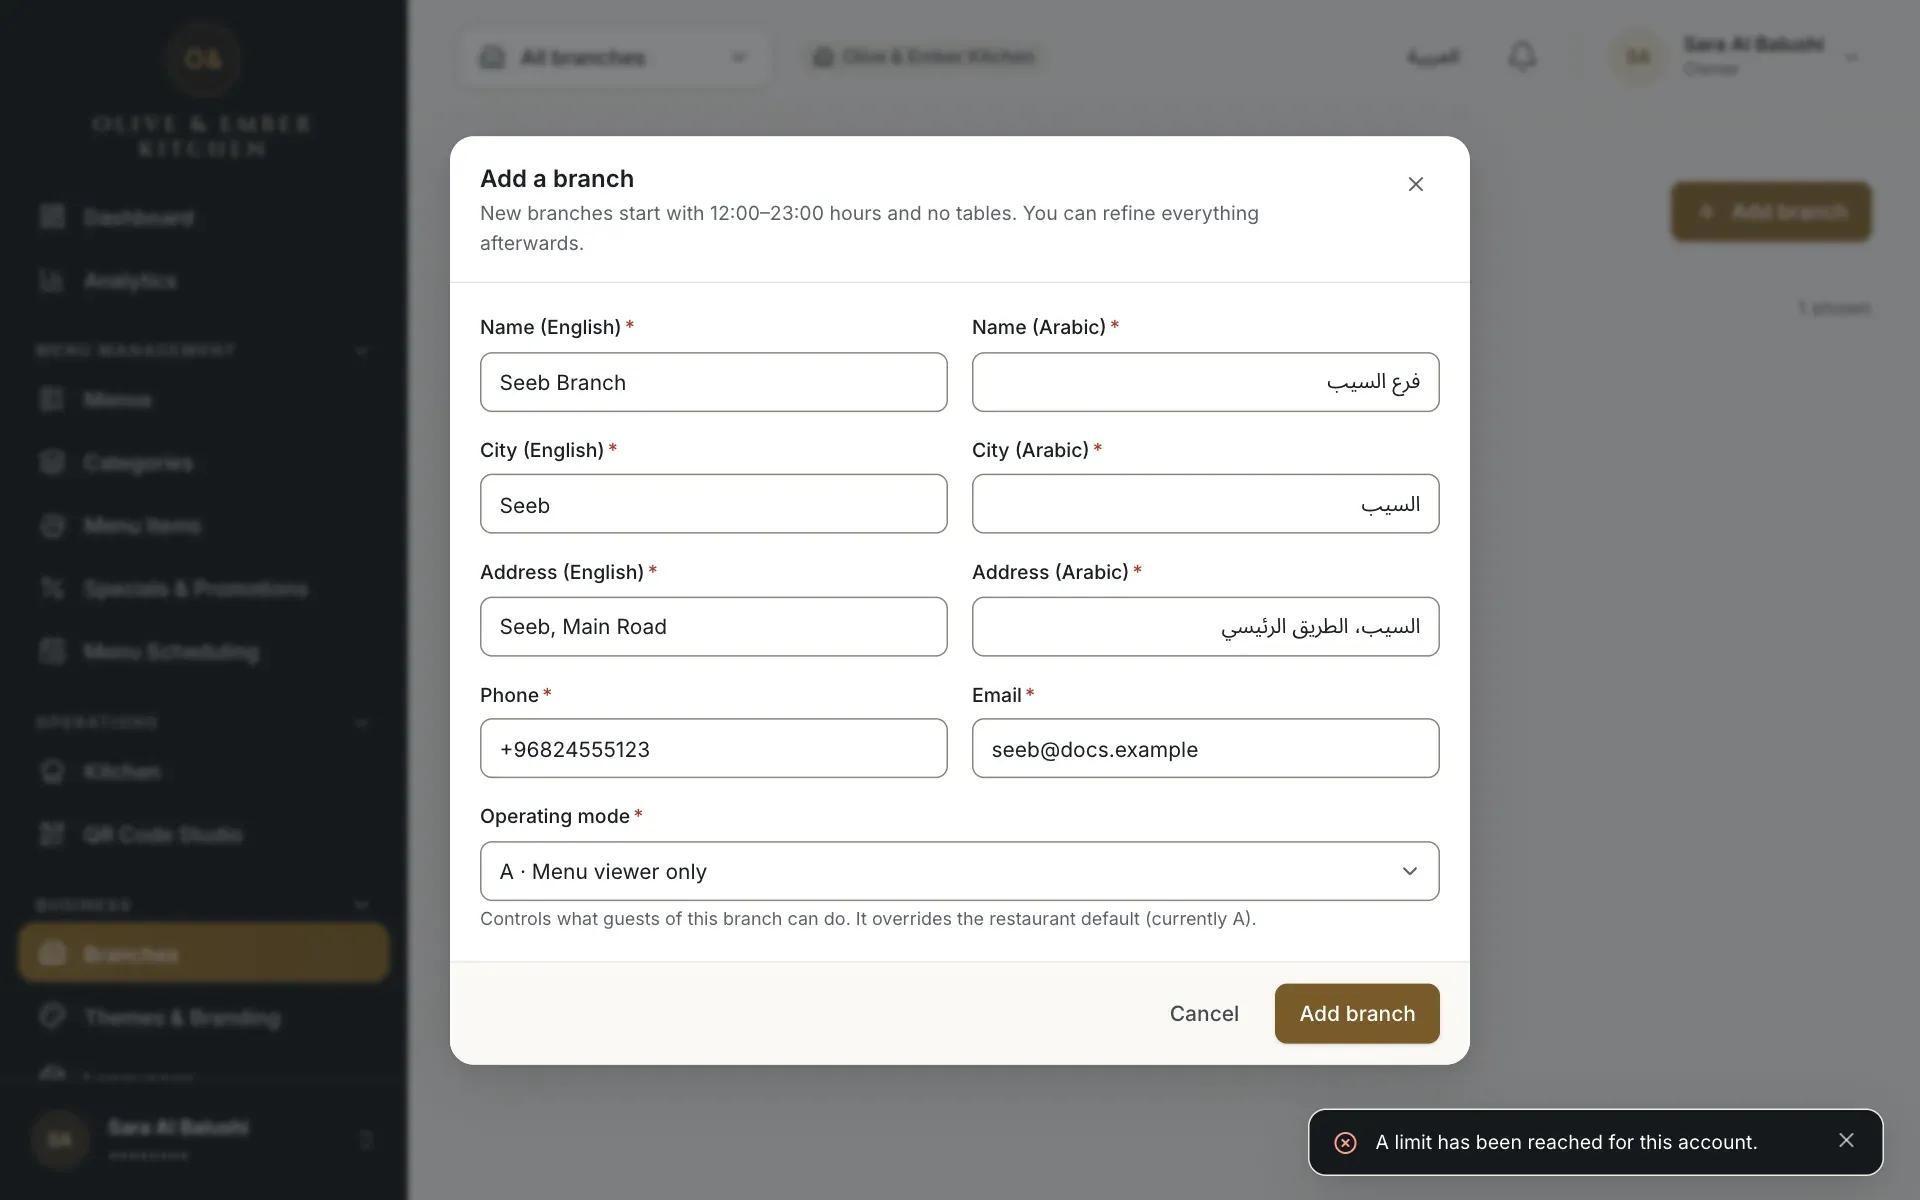
- The limit notice
Deactivating a branch
On the branch page the switch Branch is active and the button Deactivate branch make guests see an unavailable notice and stop new orders. Your data is kept and you can reactivate it.
Troubleshooting
Start the number with + and the country code (968 for Oman) and leave out spaces and dashes.
You already have as many active branches as your plan allows. Deactivate another branch or choose a bigger plan.
An Arabic field contains Latin letters. Type the Arabic name, city and address in Arabic letters.
Your role is limited to certain branches, or the link is old. Return to All branches and choose one from the list.
Only an owner or admin can add a branch. Ask one of them.
Related guides
- Restaurant setupOpening hoursSet the weekly opening hours of a branch, copy Sunday to every day, mark late closings and days off.
- Restaurant setupOperating modesChoose what guests can do at your restaurant (A, B or C), apply it to all branches or override one branch.
- Tables & QR codesAdd tablesAdd the tables of your branch, give each one a short code and a number of seats, then edit or remove them.
- Tables & QR codesCreate QR codesCreate a QR code for your restaurant, a branch or a single table, and see what a guest gets when scanning it.