
Pay by bank transfer
Choose a plan, transfer the exact amount, upload your receipt and follow the request until RothDine approves it.
- Goal
- Your payment is approved and your restaurant is on the paid plan you chose.
- Before you start
- You are the owner of the restaurant (only owners can pay)
- A bank app or branch where you can make a transfer in Omani rial
- A photo or screenshot of the transfer receipt (PNG or JPEG, up to 5 MB)
RothDine does not take cards and nothing renews by itself. You create a payment request, send the exact amount from your bank, upload the receipt, and RothDine checks it against its bank account. Your plan changes only after RothDine approves the payment. Uploading a receipt never changes your plan on its own.
Choose a plan and a term
Open Subscription & Billing and scroll to Plans. Pick Monthly or Annual, then click the button of the plan, for example Choose Professional. If you already have a paid plan the buttons read Renew Professional or Upgrade to Business.
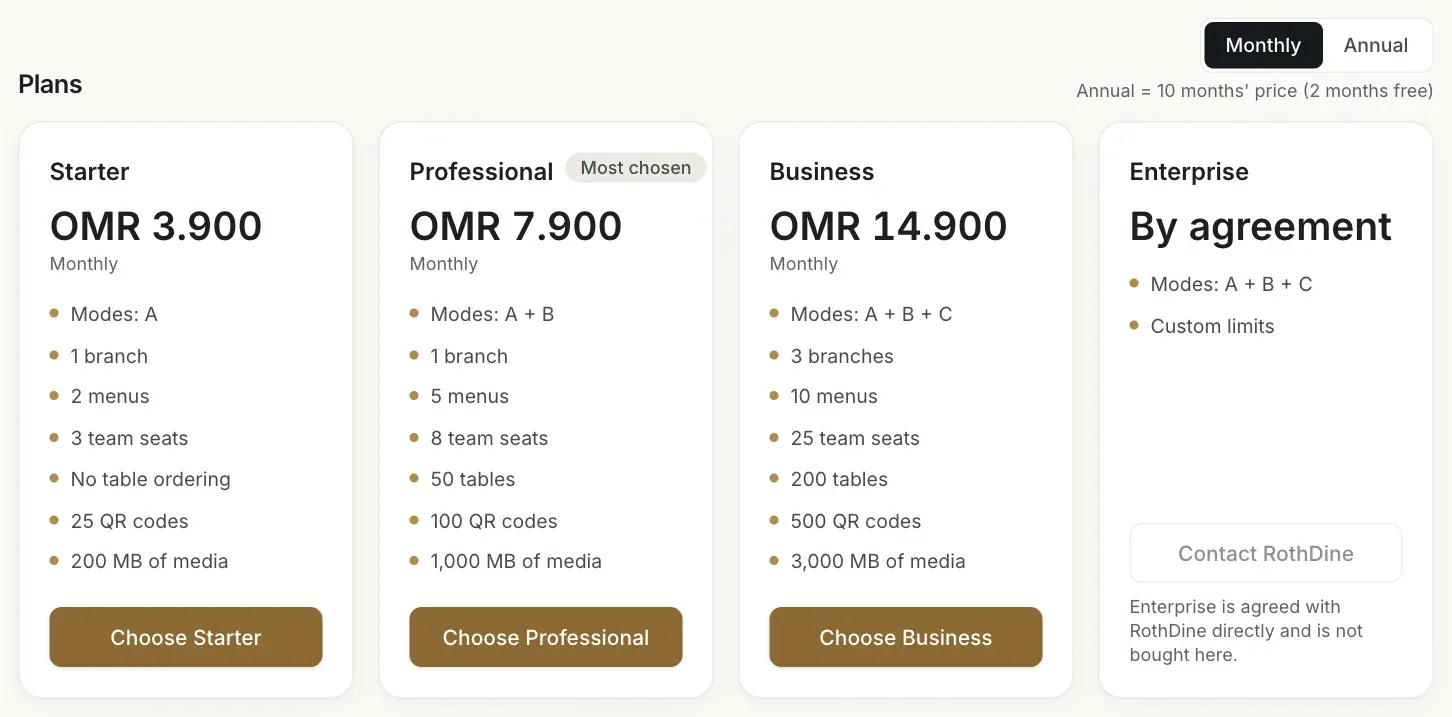
- The Monthly and Annual switch
- The Choose Professional button
Create the payment request
The Create payment request window shows the plan, the term and the Amount to transfer. Click Create request. Nothing is charged by creating the request. You can click Not now to close the window.
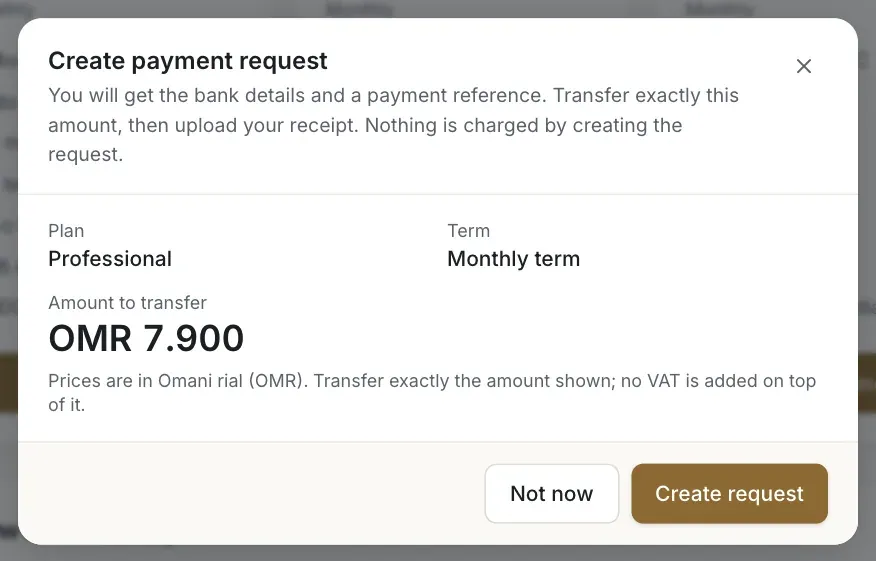
- The amount to transfer
- The Create request button
Transfer the exact amount
The Payment in progress panel appears with the status Pending. Use your bank to send exactly the Amount to transfer to the account under Bank transfer details, and type the Payment reference (it looks like RDP-2026-000123) in the transfer description. A different amount cannot be approved. Use the copy buttons next to each detail to avoid typing mistakes. The request is valid for 7 days.
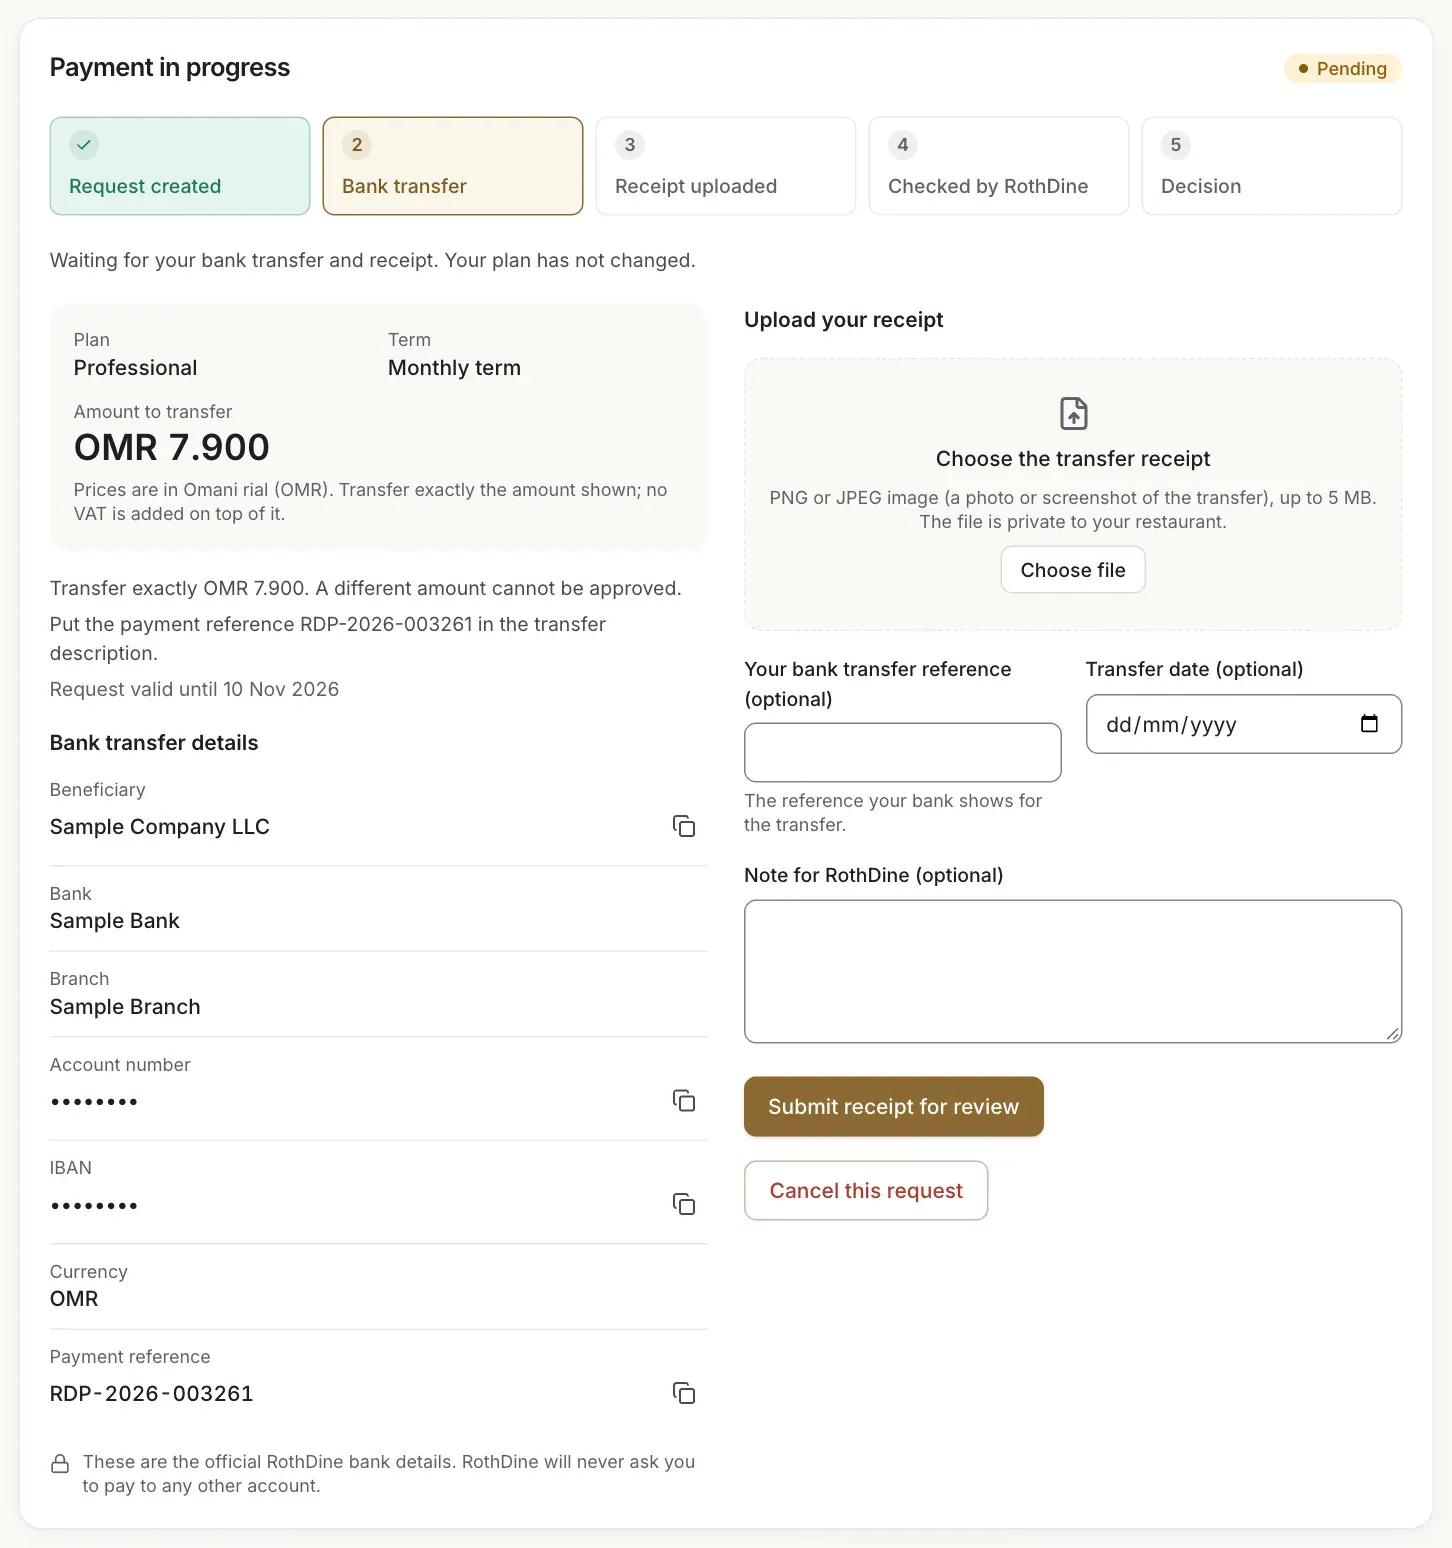
- The amount to transfer
- The bank transfer details
- The payment reference
Only pay to the details shown here
The bank details appear only inside the app, after you create a request. RothDine will never ask you to pay to any other account, and will never ask for a password, a code or a card number. In this guide the account number and IBAN are hidden and the beneficiary is a sample.
Upload your receipt
In Upload your receipt click Choose file and select a PNG or JPEG image of the transfer receipt, up to 5 MB. You can add Your bank transfer reference (optional), the Transfer date (optional) and a Note for RothDine (optional). Then click Submit receipt for review. The file is private to your restaurant.
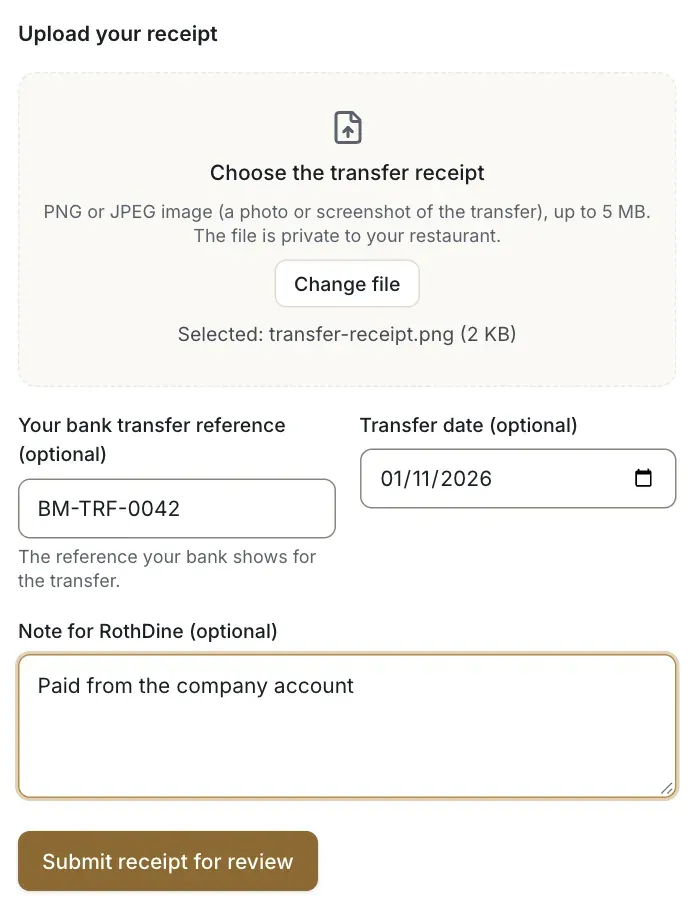
- The button to choose or change the file
- The bank transfer reference field
- The Submit receipt for review button
Wait for RothDine to review it
The status becomes Under review. The steps Request created, Bank transfer, Receipt uploaded, Checked by RothDine and Decision show where you are. RothDine checks your receipt against the credit in its bank account. Your plan has not changed yet, and you cannot cancel the request while it is under review.
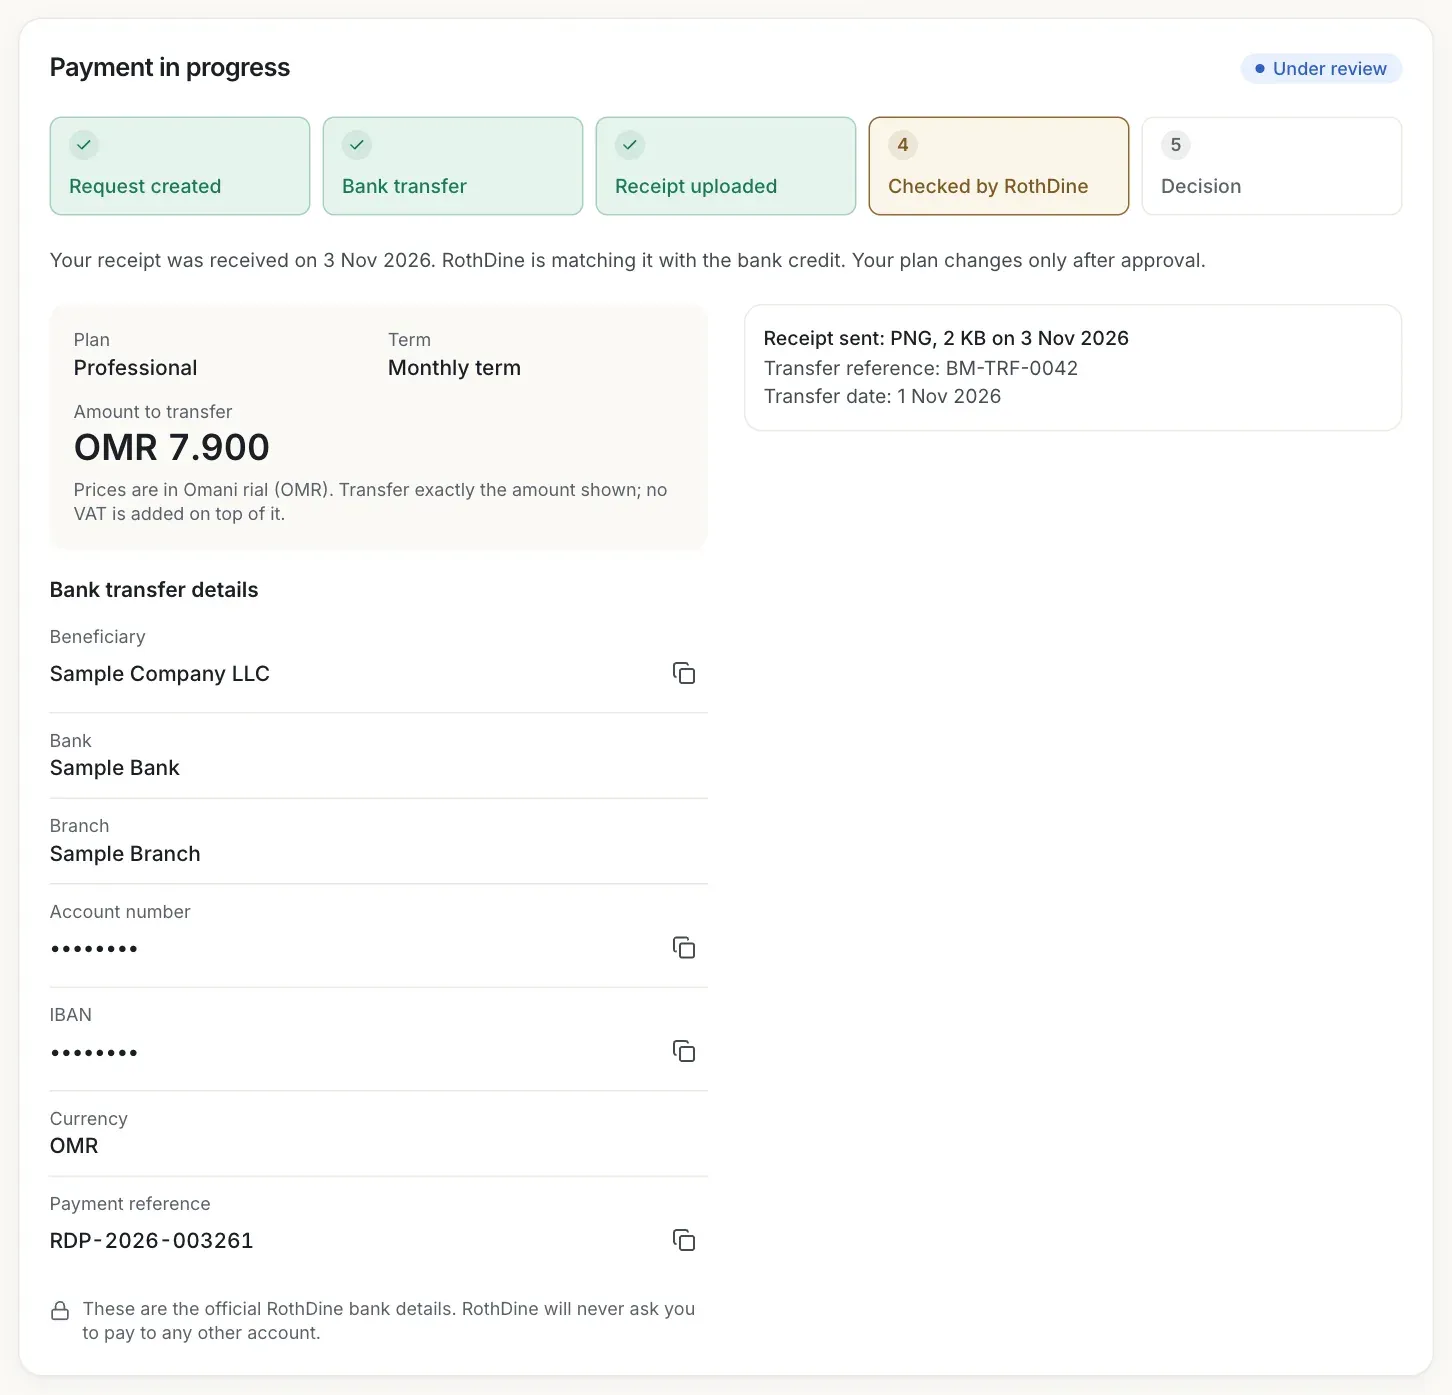
- The Under review status
- The progress steps
- The summary of the receipt you sent
If the request is rejected
If the status becomes Rejected, read Reason from RothDine. The request stays open until its 7 days end, so you can upload a new receipt in the Upload a new receipt box, or choose Cancel this request.
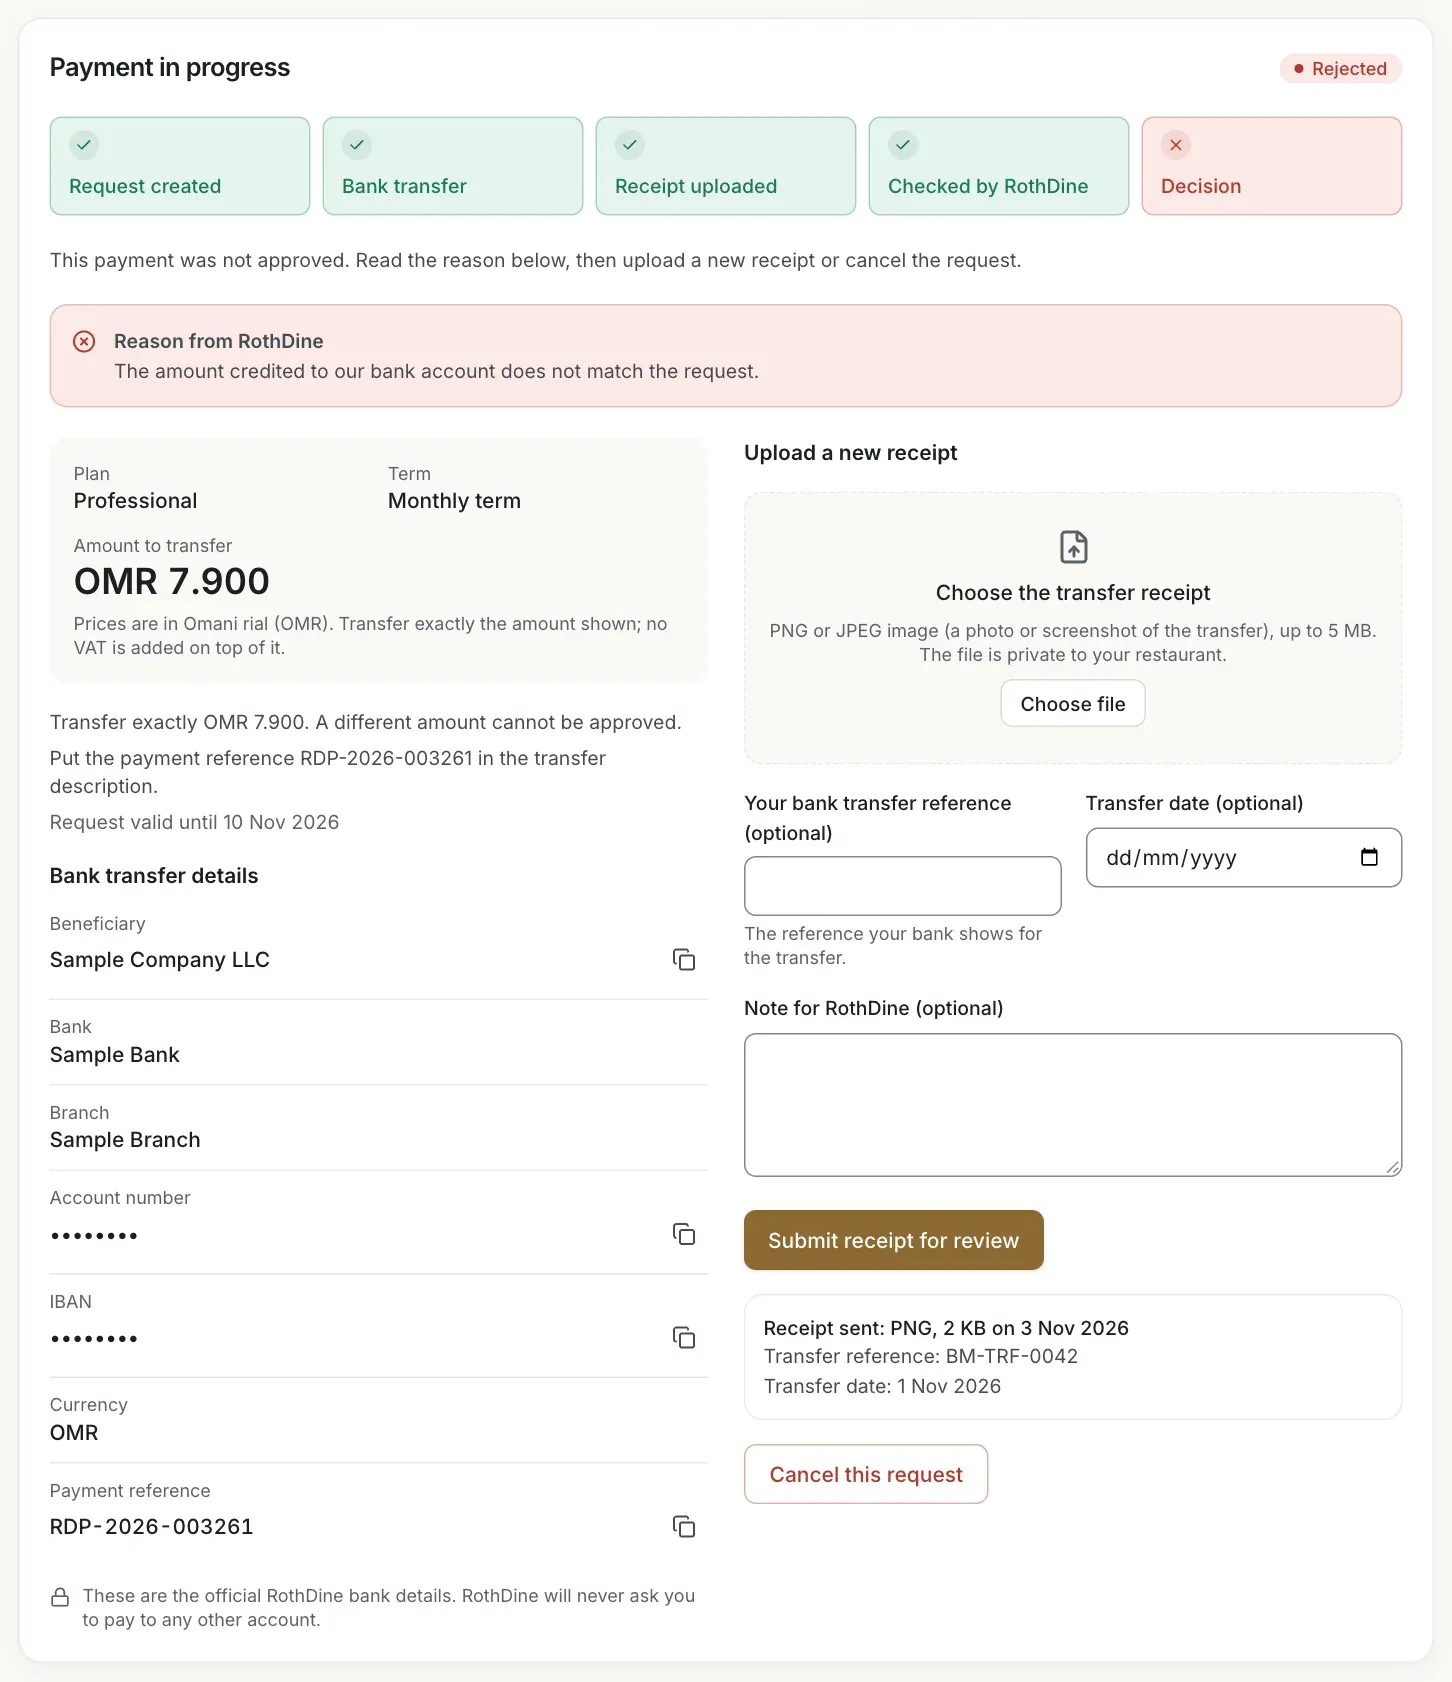
- The reason from RothDine
- The box to upload a new receipt
- The Cancel this request button
See your new plan
When RothDine approves the payment, your plan changes at once and a notice says that the payment was approved. The Subscription card shows Active with the plan, the term and the end date. If you were already on a paid plan, a renewal adds a term after the current one. A higher plan starts a new term, and days left on the old plan are not credited.
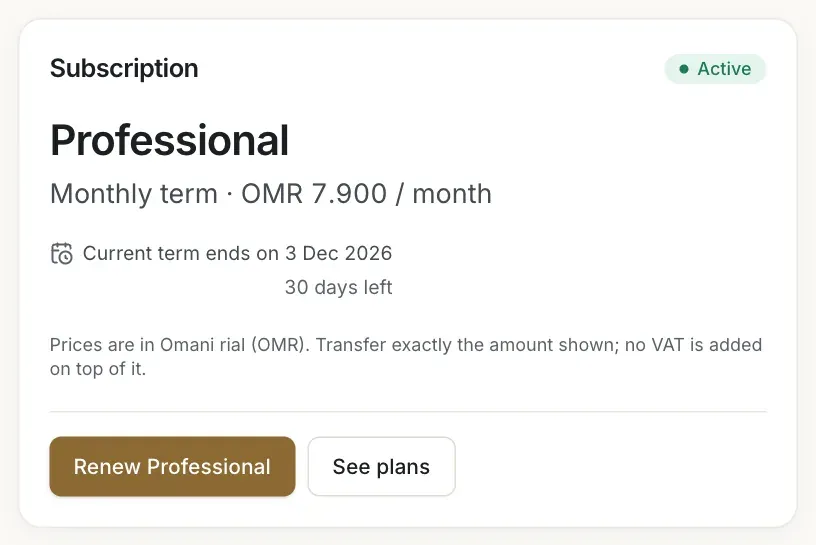
- The Active status
- The plan name and price
- The date the term ends

- The status of the payment in the history
Cancel a request or let it expire
While a request is Pending or Rejected you can choose Cancel this request, then Cancel request to confirm (or Keep it). If you already sent money, keep your receipt and contact RothDine before cancelling. A request that is still waiting for a receipt, or was rejected, when its 7 days end becomes Expired: nothing is charged and your plan is unchanged, and you can start a new request.
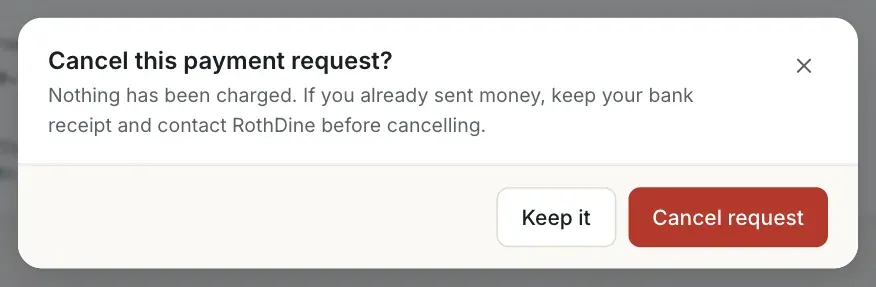
- The Cancel request button

- The Expired status
No automatic e-mail
RothDine does not send e-mails or messages about billing. Look at Subscription & Billing: the status of your request and the notices are shown there.
Troubleshooting
The bank details for transfers are not set up by RothDine yet, so payment requests are switched off. Your restaurant keeps working. Check again later.
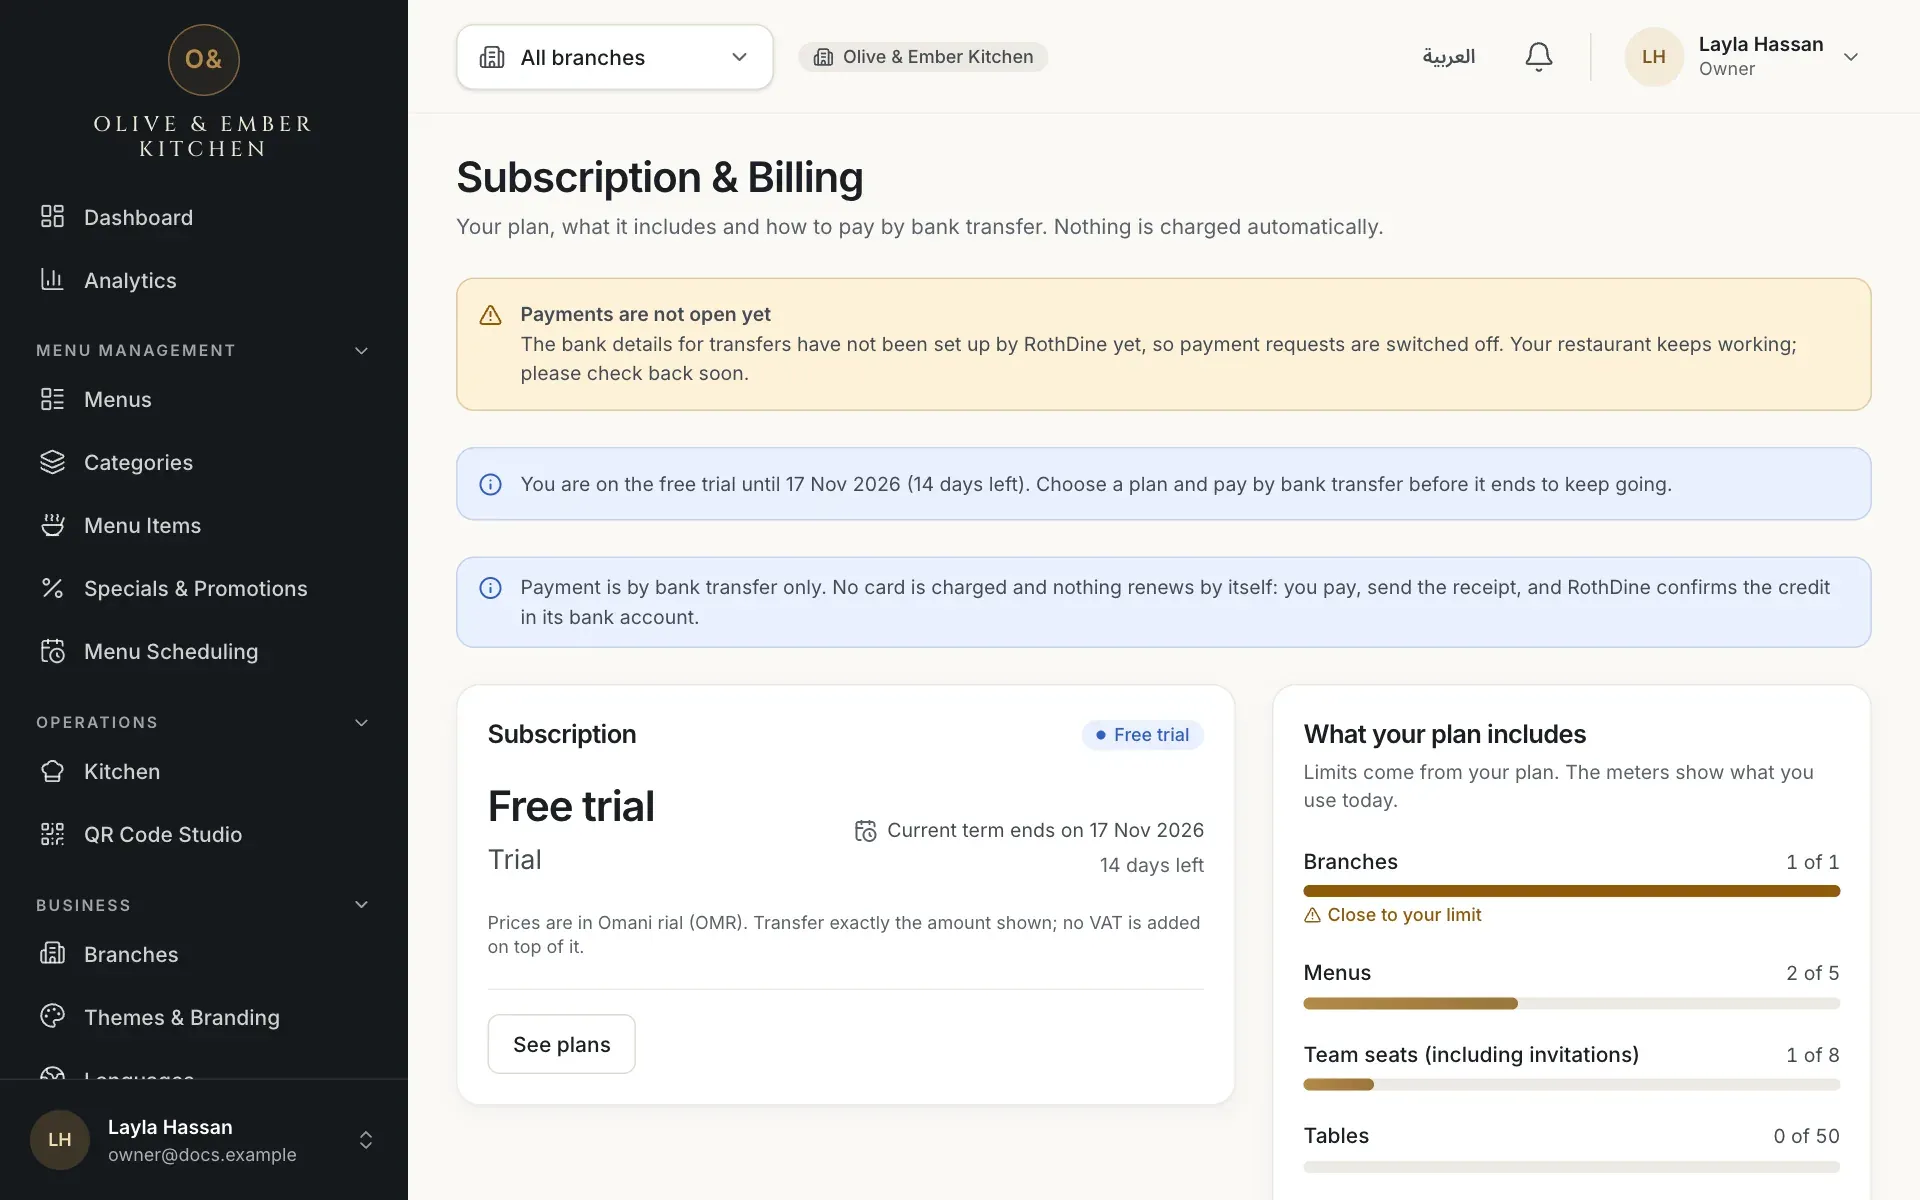
- The notice that payments are not open yet
Only one request can be open at a time. Finish the open request or cancel it, then start a new one.
Each receipt file can be used for one payment only. Upload the receipt of the transfer you made for this request.
Choose an image of the receipt in PNG or JPEG format, up to 5 MB. PDF files are not accepted. If the message says the file could not be accepted, take a new screenshot of the receipt and try again.
While a higher plan is paid and running you cannot buy a lower one. The card shows Available from with the date.
The 7 days have passed. Create a new request. If you already sent money for the old one, contact RothDine and keep your receipt.
Related guides
- Plans & billingPlans and limitsSee your current plan, what each plan includes, and how much of your limits you have used.
- Plans & billingRenewals and trial expiryWhat you see 7 days and 1 day before the end, what the 7-day grace period is, what pauses after expiry, and how to renew.
- Help & troubleshootingContact supportThe ways to reach RothDine, what to include in your message, and what support will never ask you for.
- Help & troubleshootingTroubleshootingFind the message you see on screen, learn what it means and how to fix it, grouped by area.