
Add tables
Add the tables of your branch, give each one a short code and a number of seats, then edit or remove them.
- Goal
- Every table of your branch is listed in Table Management, ready to get its own QR code.
- Before you start
- A branch that runs Menu + waiter (B) or Full table ordering (C)
- A role that can manage tables: owner, admin, branch manager or order manager
A table in RothDine is a short code, such as T1, and a number of seats. The code appears on the table QR code and on every order from that table. Owners, admins, branch managers and order managers can add and change tables. Waiters and viewers can look at them.
Open Table Management
In the sidebar, under Operations, choose Table Management. A new branch has no tables yet, so you see No tables yet. If you cannot find the entry, the branch is probably in the menu-only mode. See the last step.
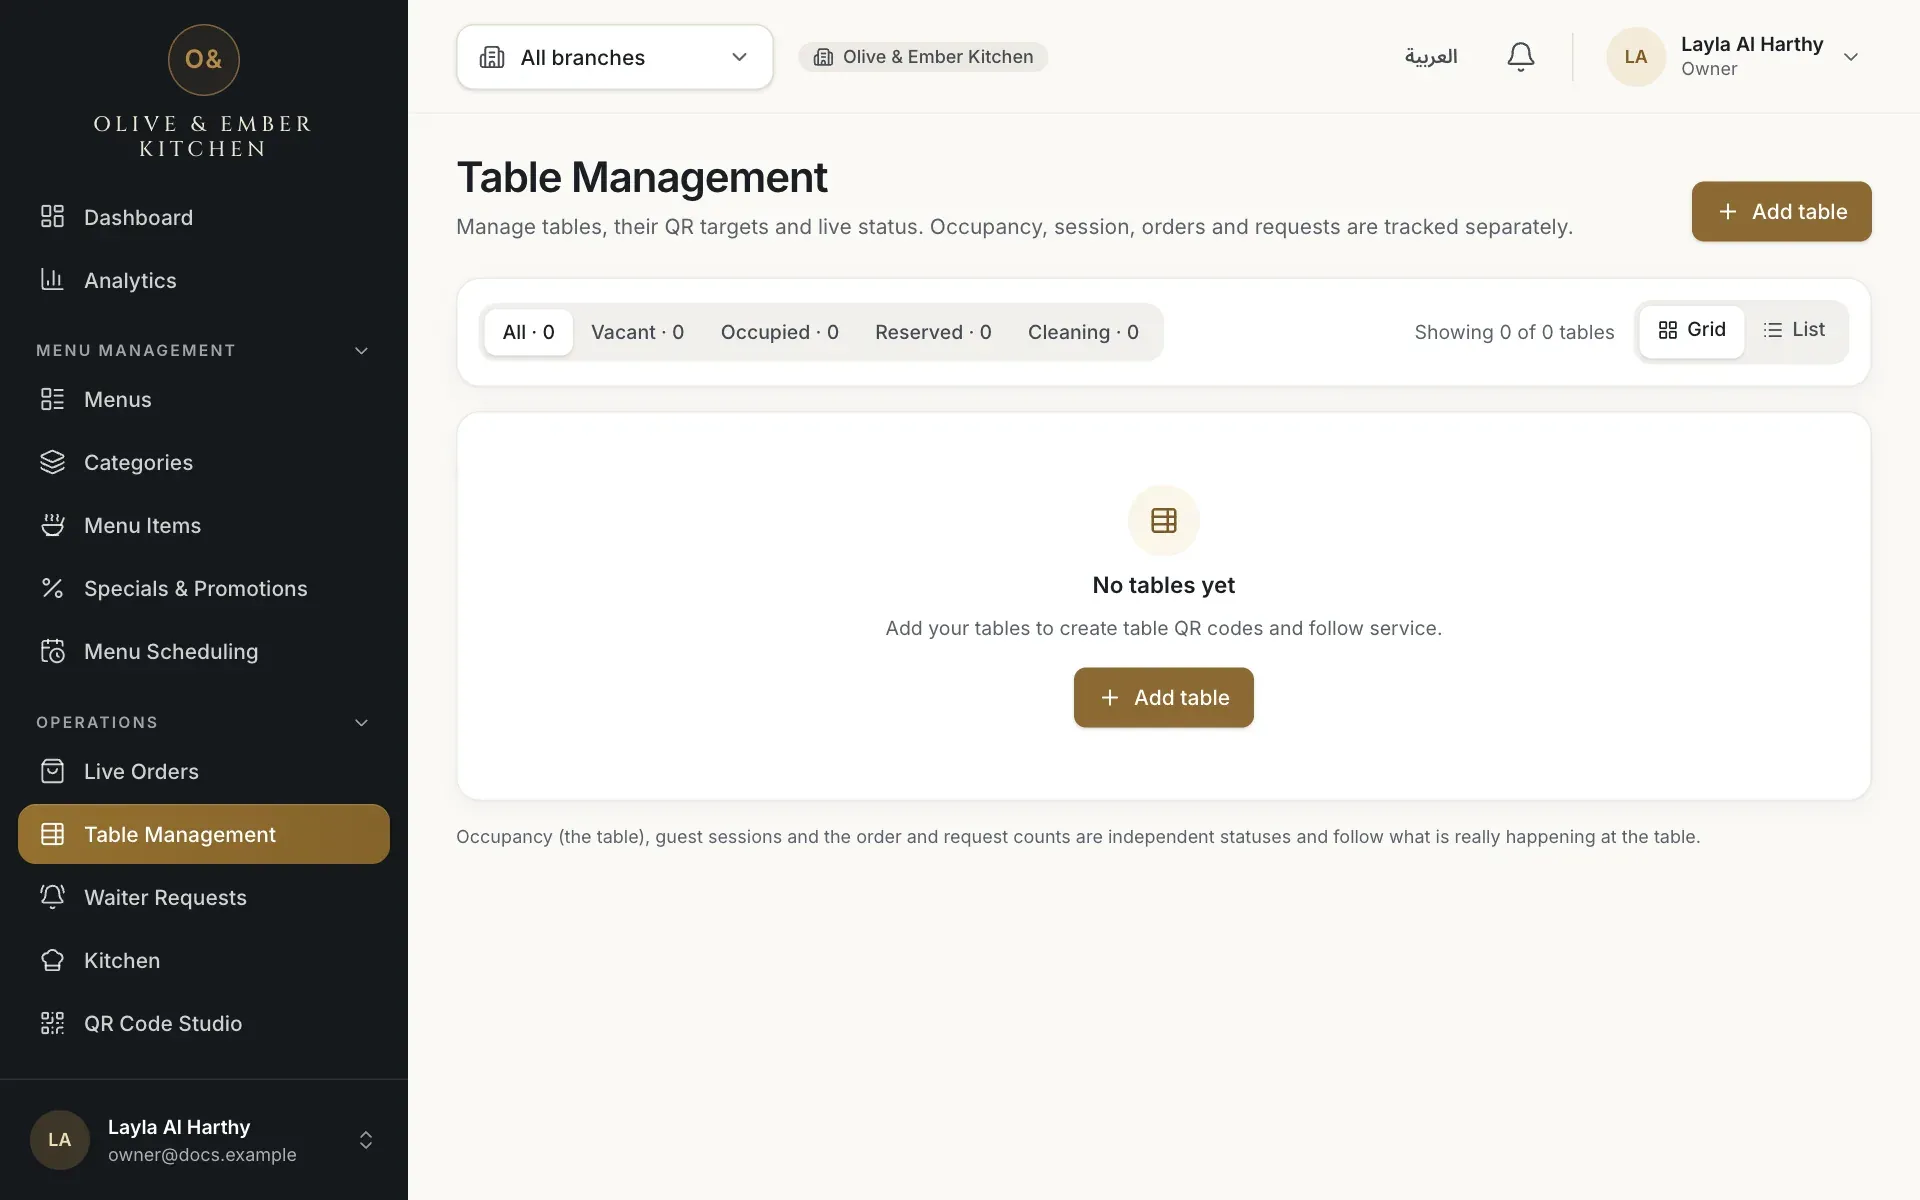
- Table Management in the sidebar
- The Add table button
Click Add table
Click Add table. A form opens with a code, the number of seats and the table state.
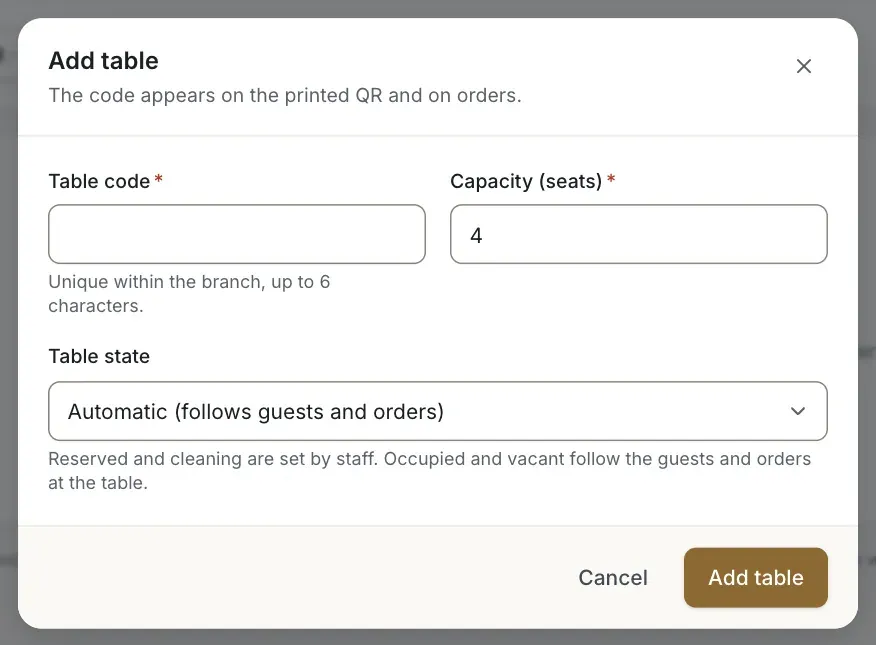
- Table code
- Capacity (seats)
- Table state
Enter the code and the seats, then save
Type a Table code of 1 to 6 characters. Use English letters, numbers and hyphens, for example T1, 12 or A-3. Each code can be used once in a branch. Enter the Capacity (seats), a whole number from 1 to 50. Leave Table state on Automatic (follows guests and orders), then click Add table.
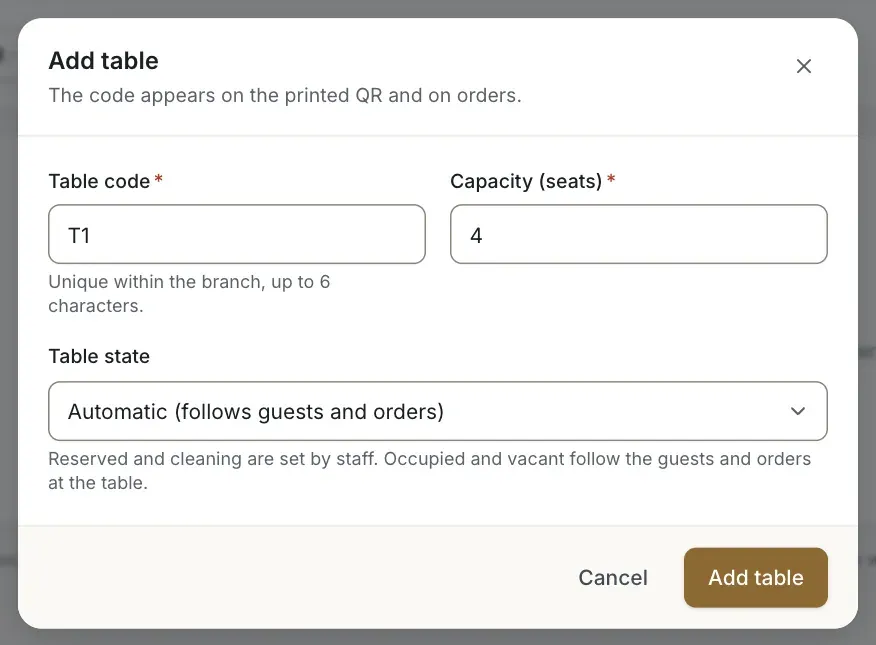
- The table code
- The Add table button that saves the table
Check the new table
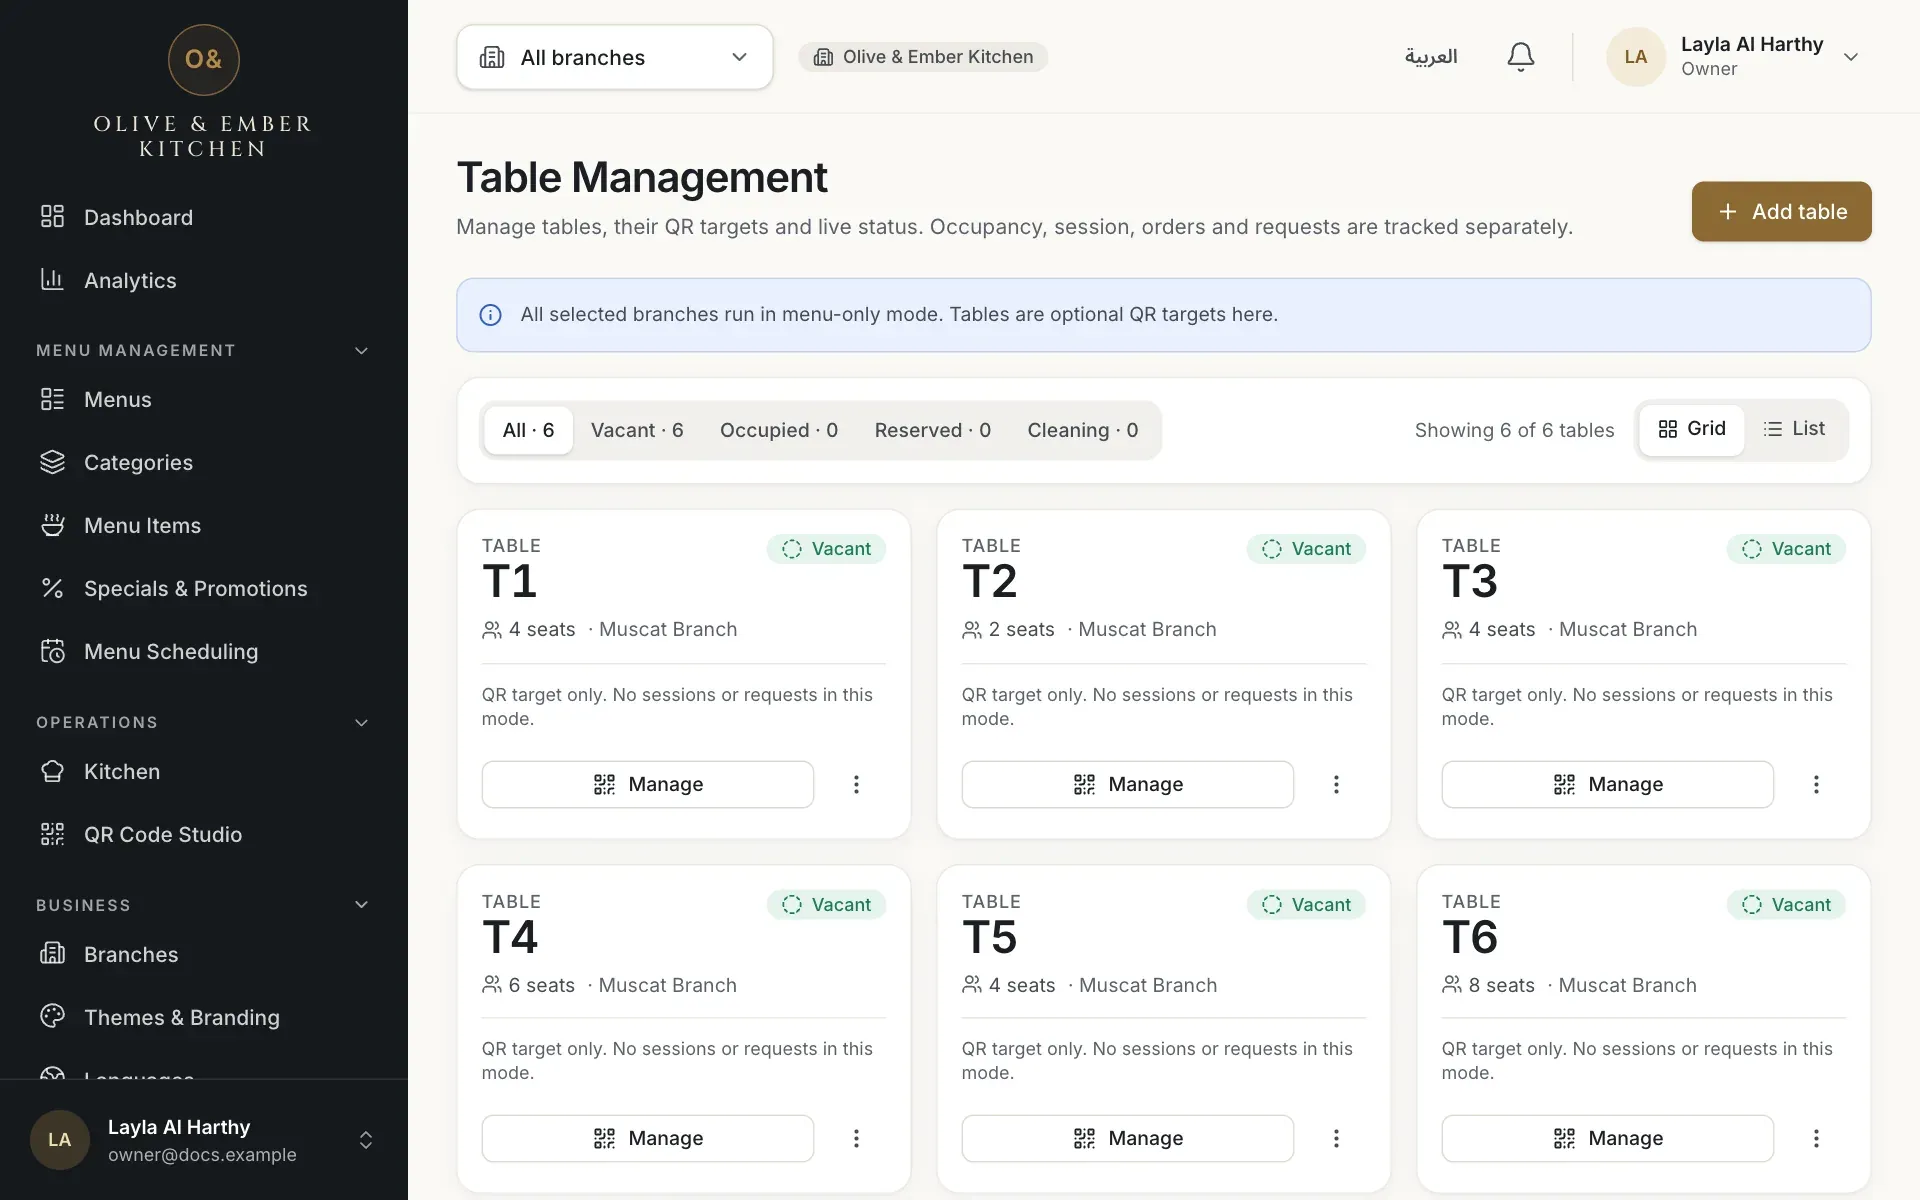
The table appears as a card with its code, its seats and the status Vacant. The card also shows the table session, the active orders and the pending requests. Manage opens the details of the table, including the guests who scanned its QR code.
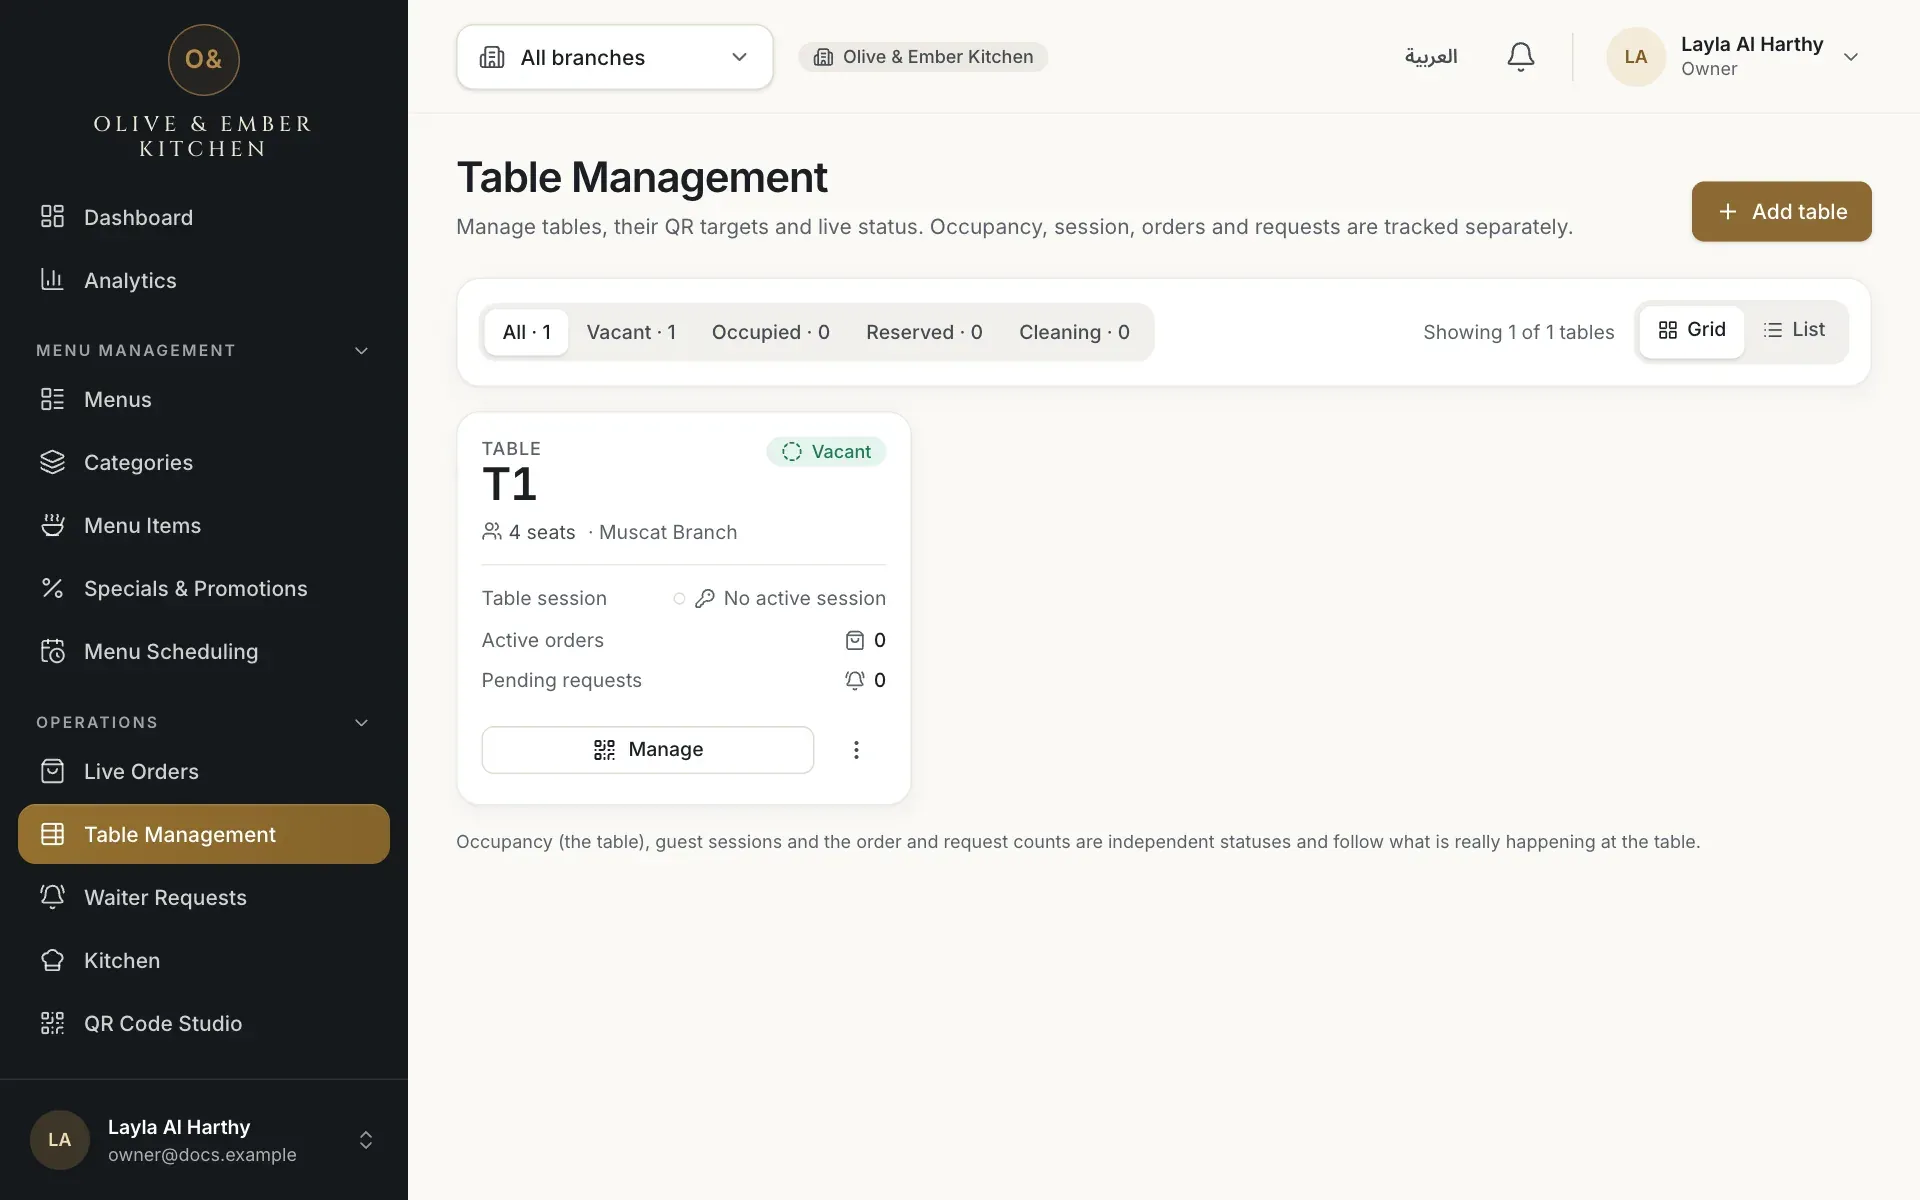
- The card of table T1
Add the other tables and find them
Repeat the steps above for every table. The filter at the top shows how many tables are Vacant, Occupied, Reserved or in Cleaning. Switch between Grid and List to see the tables as cards or as rows. Occupied and vacant follow the guests and the orders at the table by themselves.
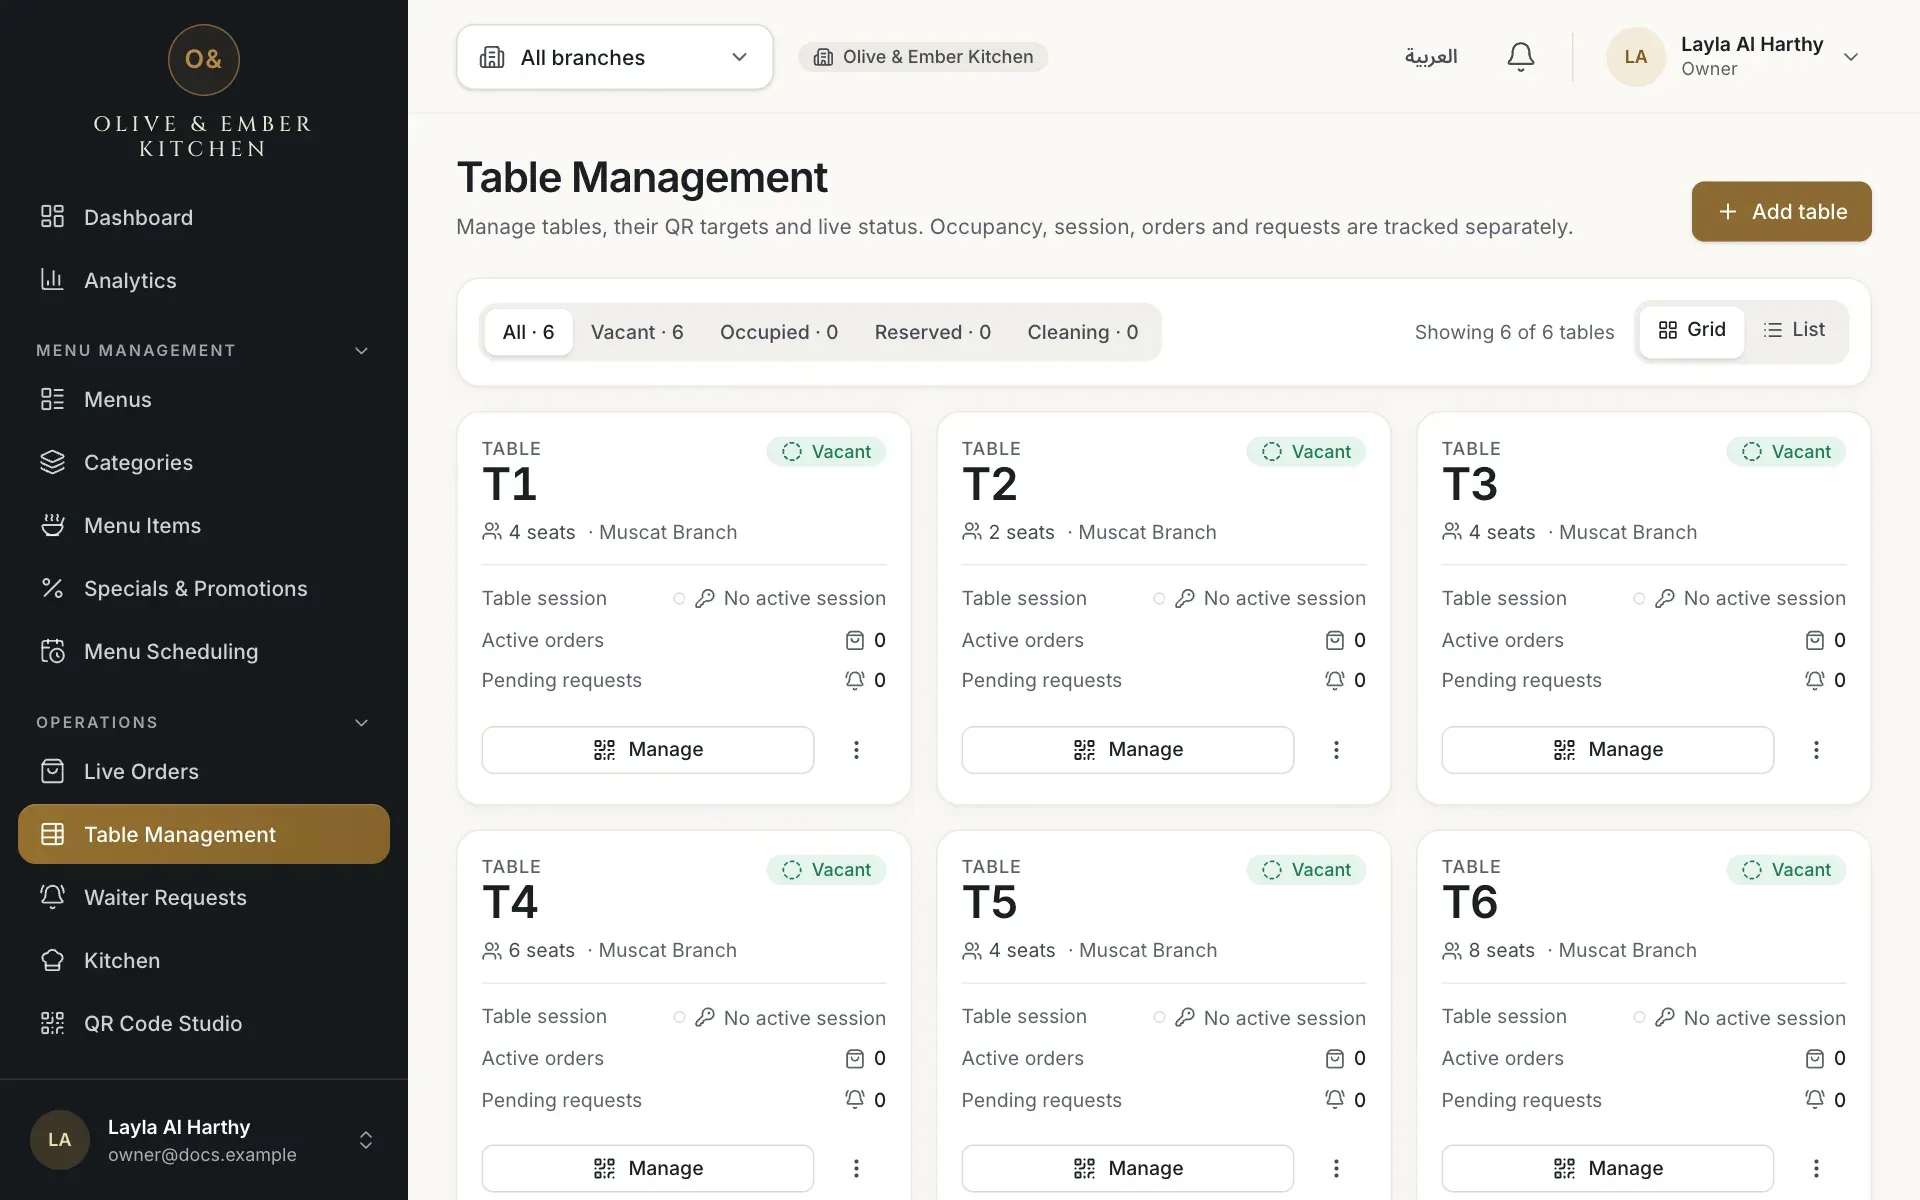
- The occupancy filter
- The Grid and List switch
Open the table menu
On the card of a table, click the three dots. The menu has Edit and Delete.
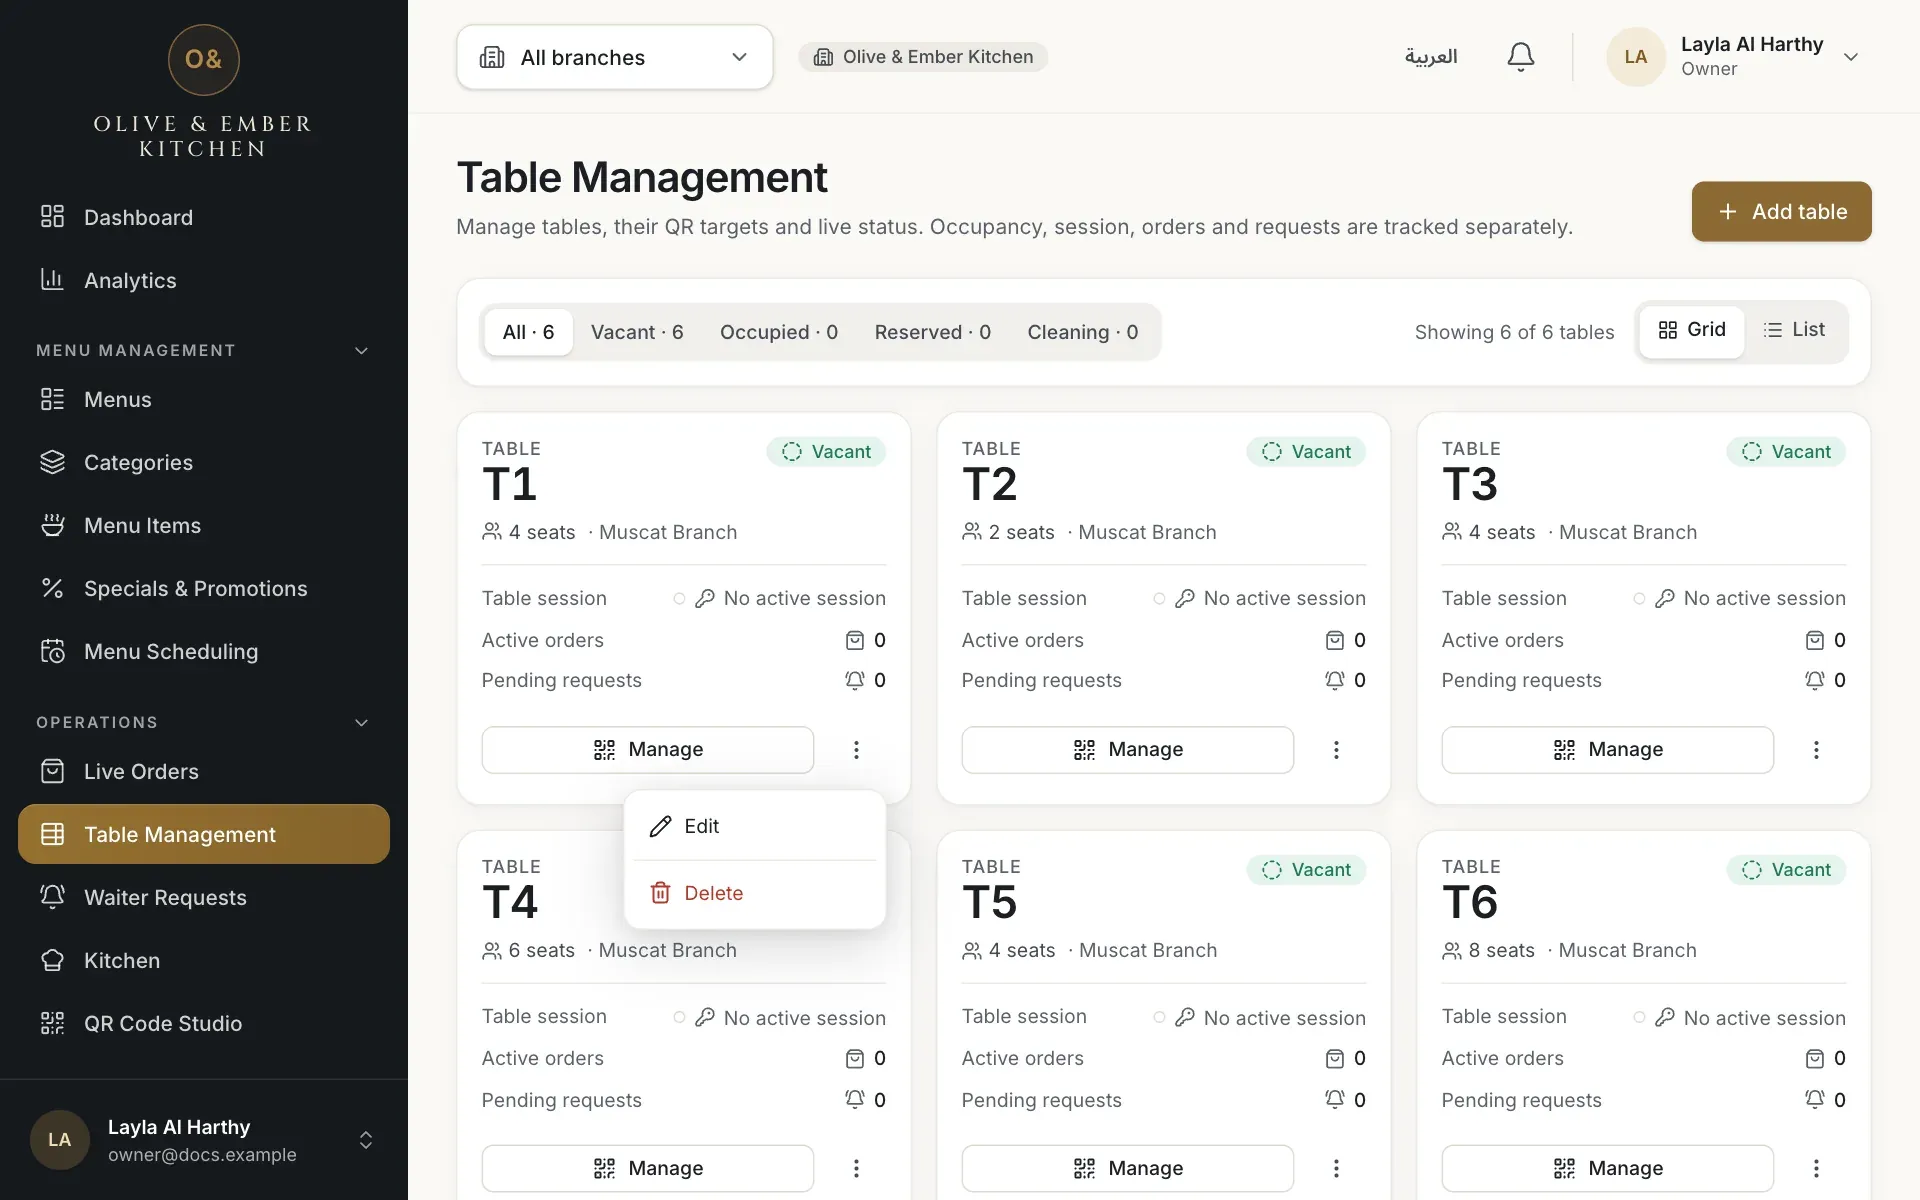
- The three dots button
- Edit
- Delete
Edit the seats or the state
Choose Edit. You can change the seats and the table state: Reserved or Cleaning are set by staff, Automatic follows the guests. The table code cannot change once the table exists. If you typed the wrong code, remove the table and add it again. Click Save changes.
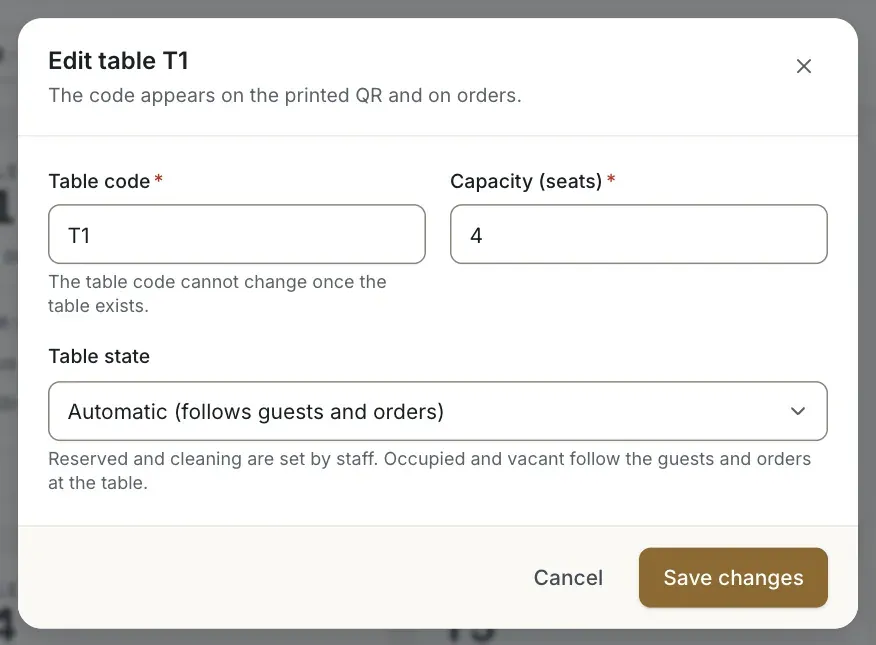
- The table code, which cannot be changed
- Capacity (seats)
- The Save changes button
Remove a table you no longer use
Choose Delete in the table menu, then click Remove table to confirm. The table leaves the floor and its table QR codes stop working. Guests sitting there are signed out. Orders that are already finished stay in the history, and you can add a table with the same code again later.
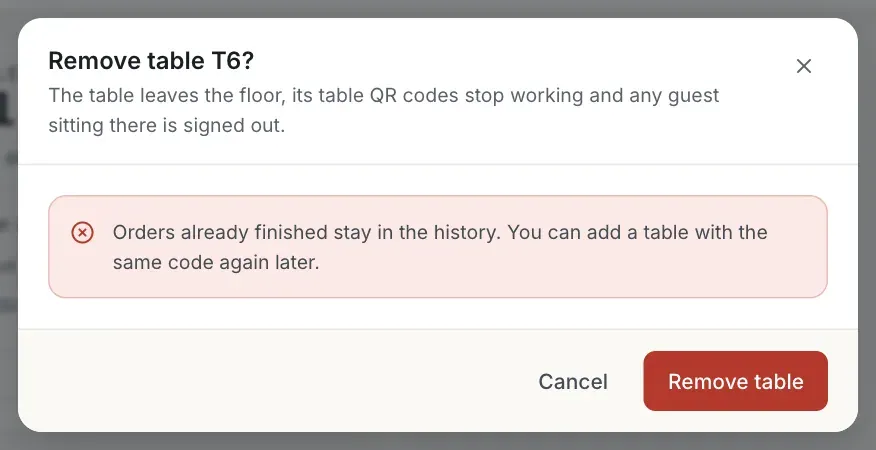
- The Remove table button
Know what each operating mode shows
Tables work in the modes Menu + waiter and Full table ordering. In Menu viewer only mode, tables are optional QR targets and the page says so: guest sessions, orders and waiter requests do not apply. Change the mode in Restaurant Settings or per branch in Branches.
Your plan sets the limit
The number of tables per branch depends on your plan. When you reach it, the app says A limit has been reached for this account. See the plans and limits guide in the Billing section.
Troubleshooting
Another table of the same branch has this code. Choose a different code. The same code can exist in two different branches.
The table code in this form is limited to 6 characters. Shorten it, for example T-12 instead of TABLE-12.
Remove spaces and special characters. Use English letters, numbers and hyphens.
A guest at this table has an order that is not yet served or finished. Finish or cancel the order in Live Orders, then remove the table.
Your plan allows a limited number of tables per branch, or does not include Table Management. Check your plan under Subscription & Billing.
Related guides
- Tables & QR codesCreate QR codesCreate a QR code for your restaurant, a branch or a single table, and see what a guest gets when scanning it.
- Restaurant setupOperating modesChoose what guests can do at your restaurant (A, B or C), apply it to all branches or override one branch.
- OrdersHow guests orderWhat your guests do on their phone, from scanning the table QR code to sending an order, following it and calling the waiter.